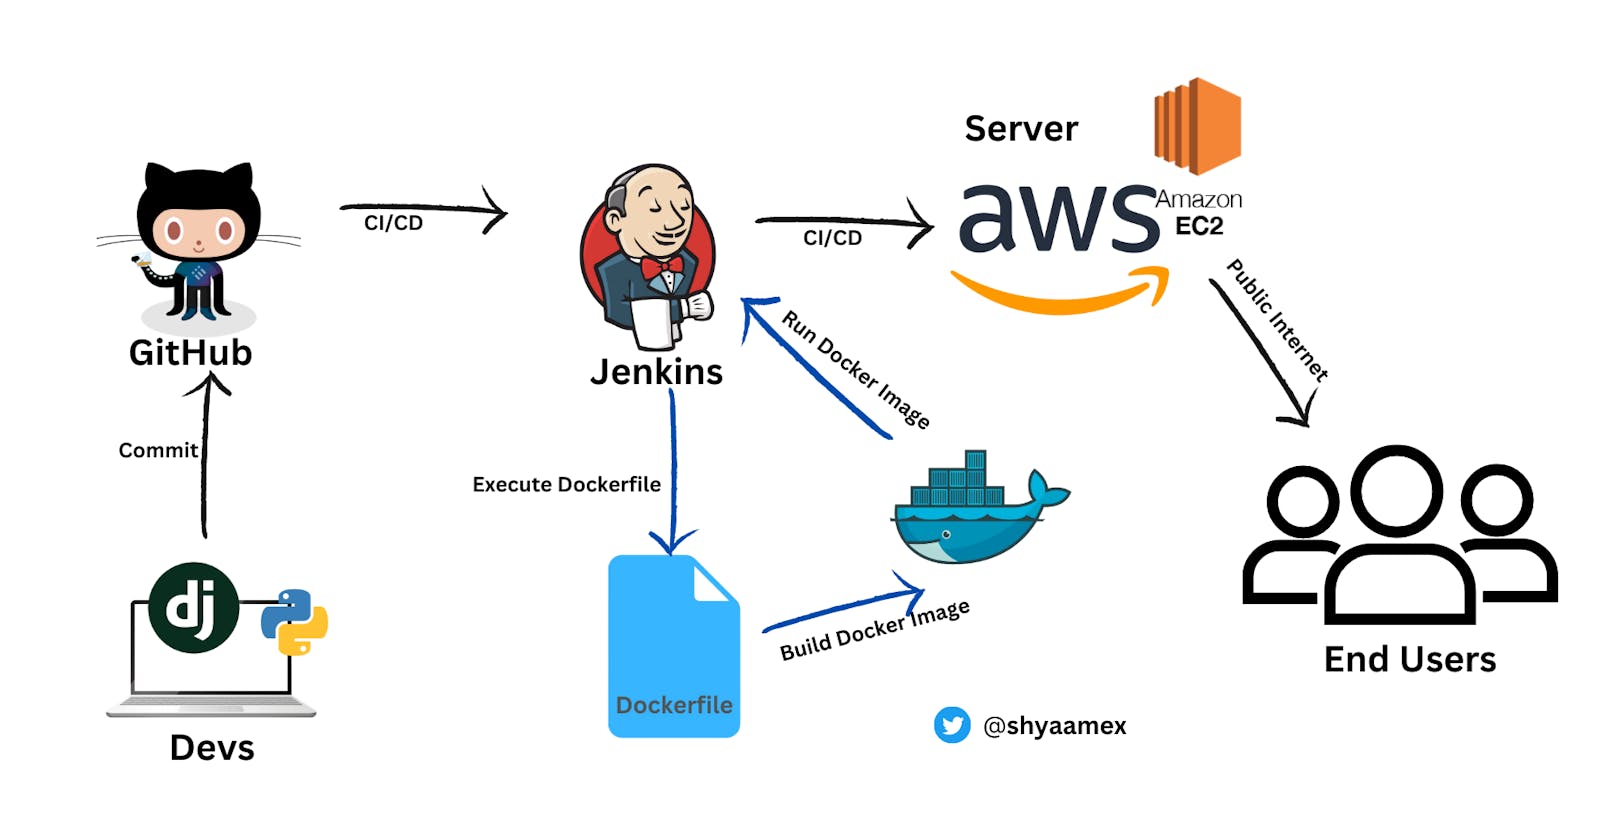
End to End Project: Deployed Django Application with Jenkins CI/CD Pipeline
Source code is directly taken from GitHub repository and deployed via CI/CD pipeline using AWS EC2 instance.
Table of contents
- Prerequisite
- Step 0, Creating & connecting an EC2 instance
- Step 1, install docker and Jenkins on your Linux server (ec2 instance)
- Step 2, Basic setup of Jenkins
- Step 3, Set up an agent for pipelines in Jenkins
- Step 4, GitHub integration
- Step 5, Configuration of CI/CD pipeline
- Step 6, Build Pipeline
- Step 7, Checkout the deployed project
Prerequisite
You must have an AWS account and basic knowledge of AWS
You should have an understanding of Python and Django framework
You must be familiar with Linux, Docker and Jenkins
You must know to work with Git & GitHub
Step 0, Creating & connecting an EC2 instance
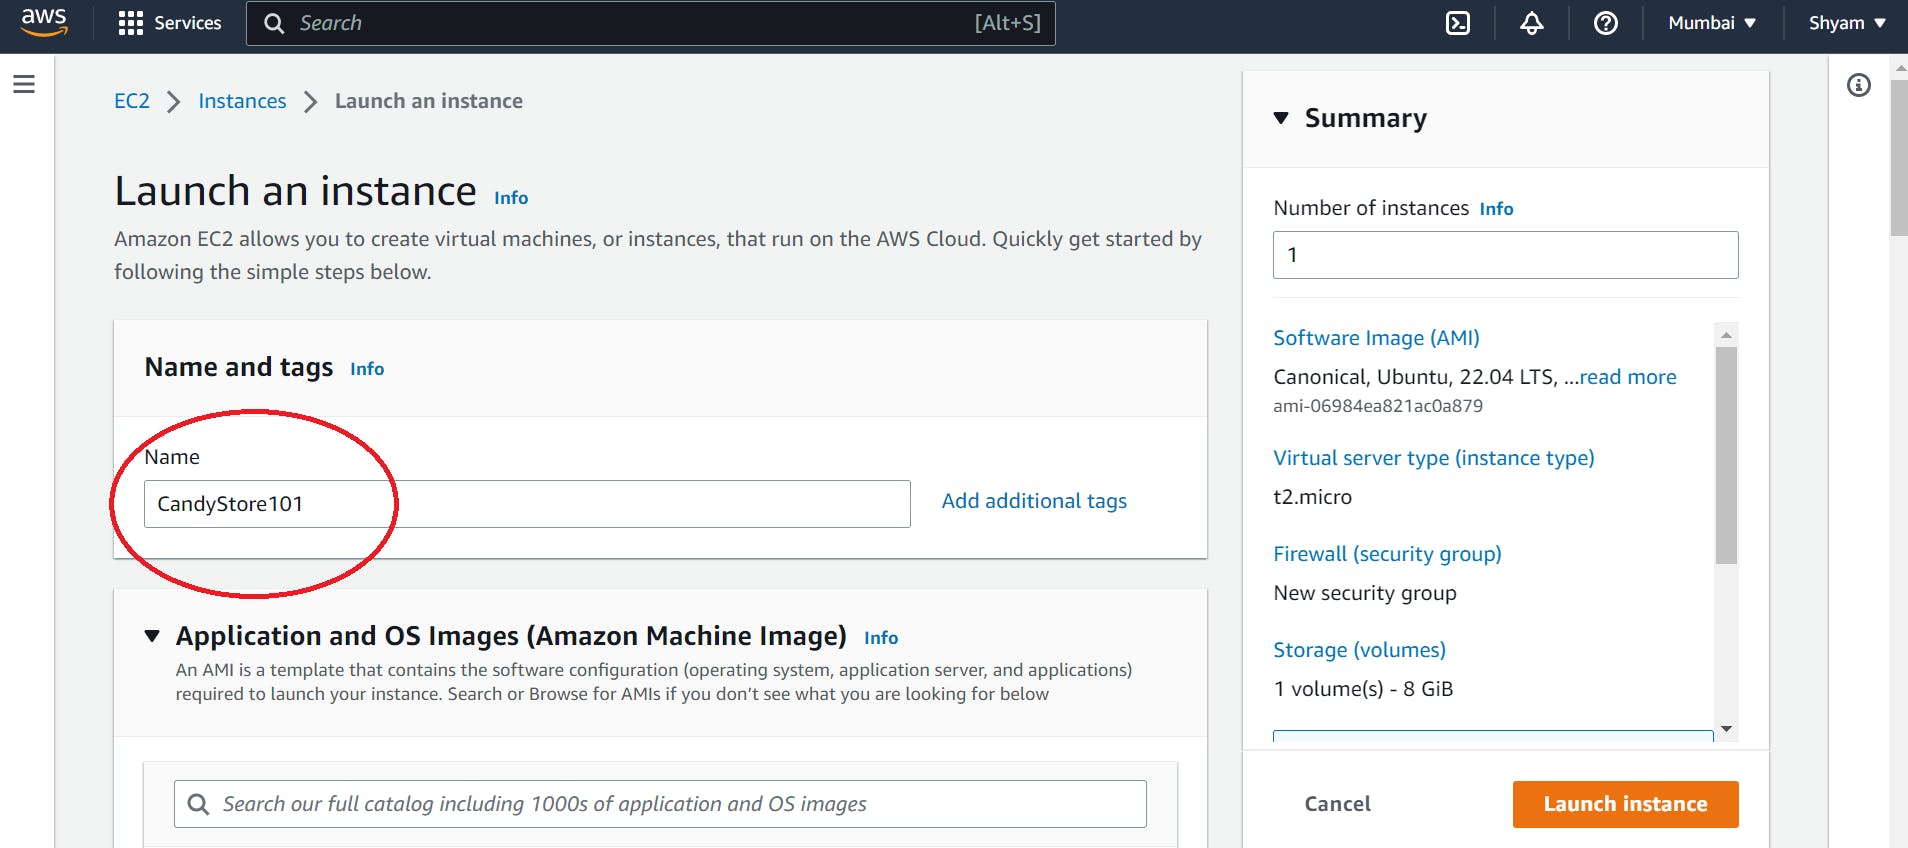
- Create an EC2 instance and launch this instance:
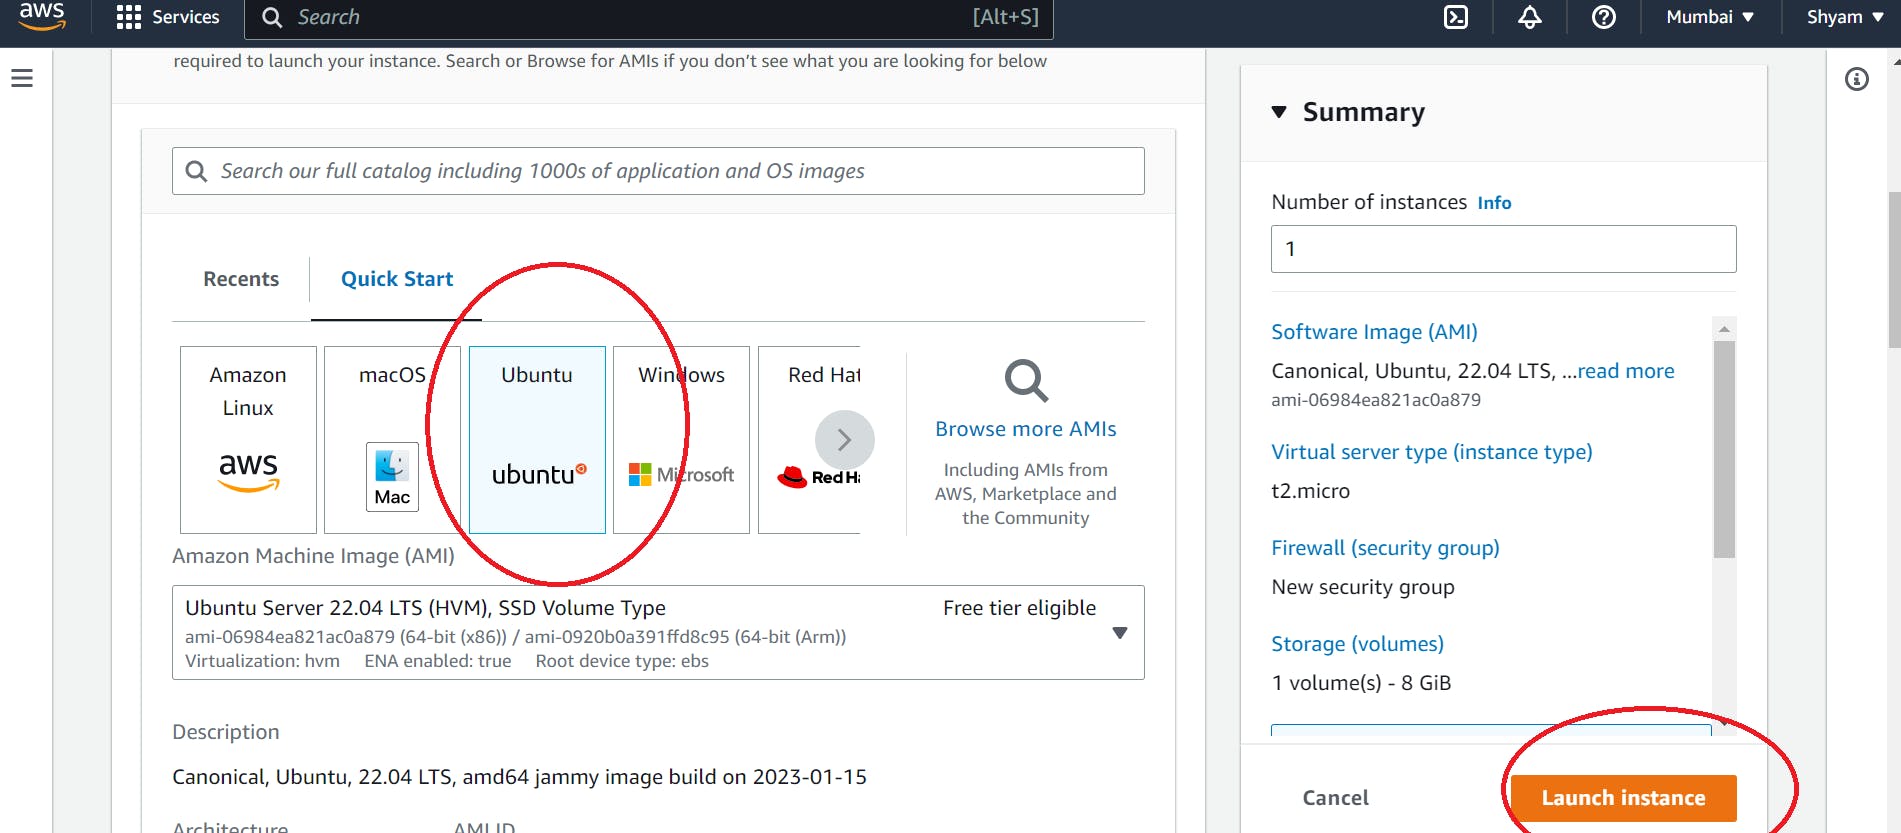
First, Enter the name (your choice) of your Linux server, choose the ubuntu image, create a key-pair for SSH and then click on launch instance.
- Wait, for a while. Then select your created instance and click on connect.
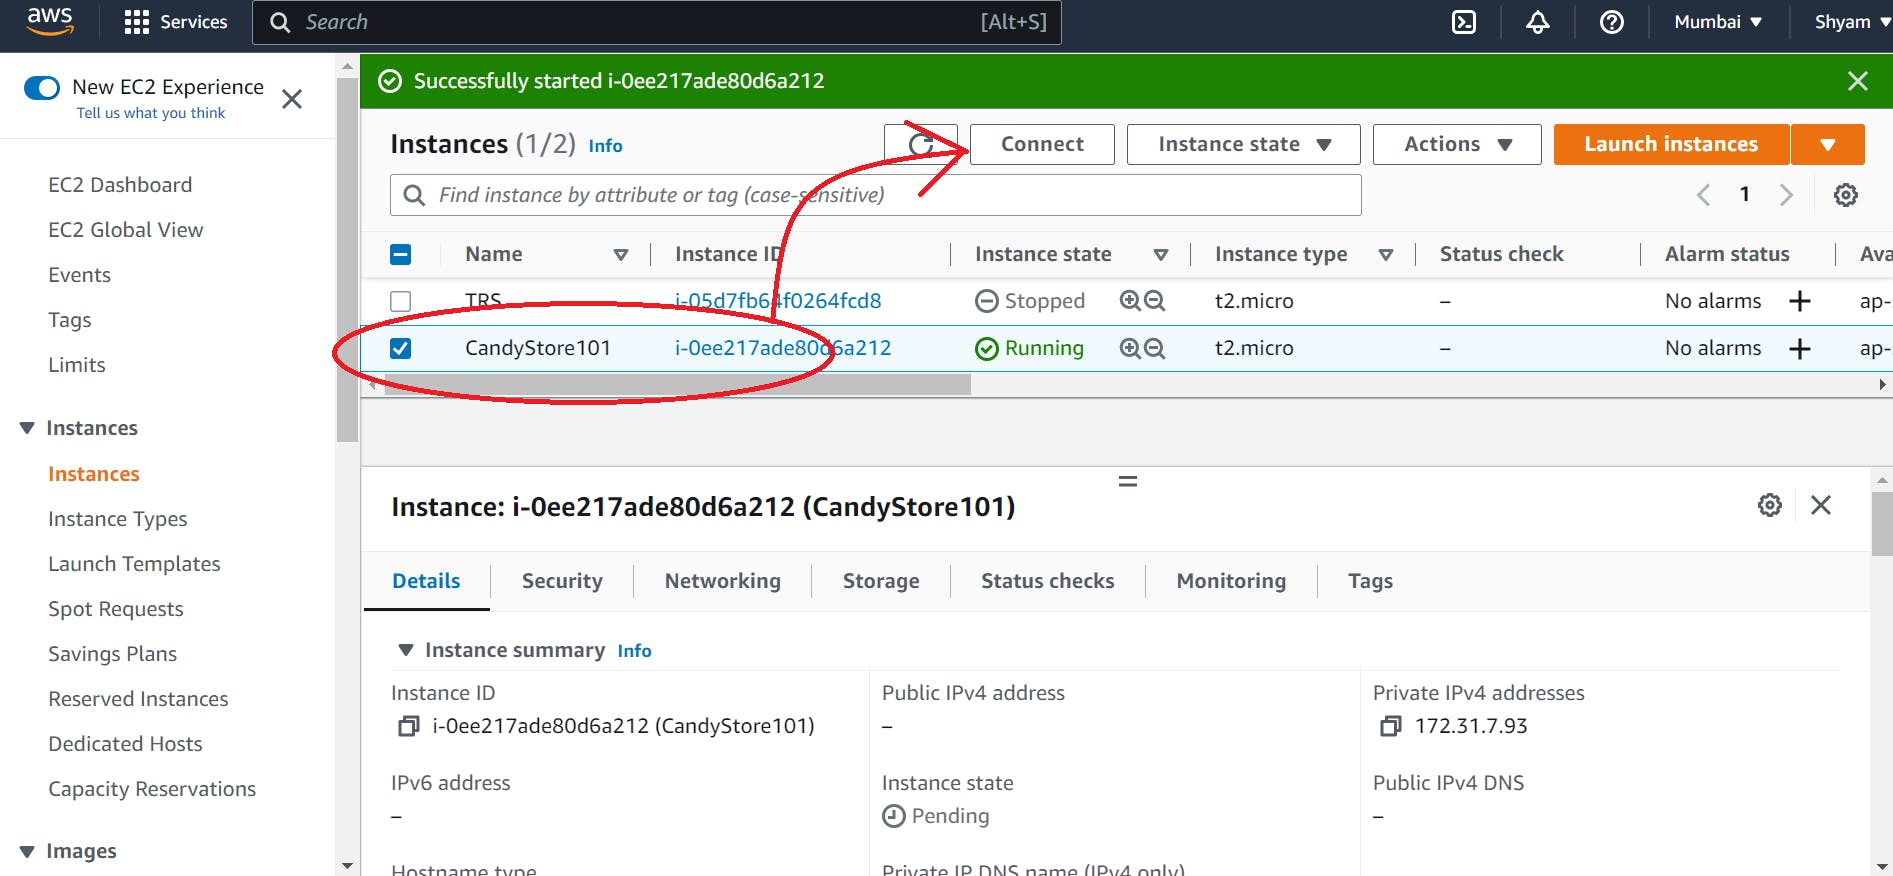
Now, connect over the browser
or create an SSH on your local machine (recommended)
Step 1, install docker and Jenkins on your Linux server (ec2 instance)
Commands to install Docker;
sudo apt-get update
sudo apt install docker.io
Commands to install Jenkins in sequence ( Run one after the other)
First, install java
sudo apt-get update

sudo apt-get install openjdk-11-jdk
Now, install the dependencies ( Just copy this code altogether and paste in your console)
curl -fsSL https://pkg.jenkins.io/debian-stable/jenkins.io.key | sudo tee \
/usr/share/keyrings/jenkins-keyring.asc > /dev/null


echo deb [signed-by=/usr/share/keyrings/jenkins-keyring.asc] \
  https://pkg.jenkins.io/debian-stable binary/ | sudo tee \
  /etc/apt/sources.list.d/jenkins.list > /dev/null

sudo apt-get update

sudo apt-get install jenkins
Start Jenkins and check the Status
sudo systemctl start jenkins.service

sudo systemctl status jenkins
Step 2, Basic setup of Jenkins
We can access Jenkins on port 8080;
Now open your browser and enter http://<ip of ec2 instance>:8080
Still, you can't access Jenkins on port 8080, as our server didn't allow incoming traffic on port 8080. For that go to -> security settings -> Edit inbound rules -> add rule -> add port 8080 and access from anywhere -> save rules.
Now you can access Jenkins on port 8080. It would look something like this:
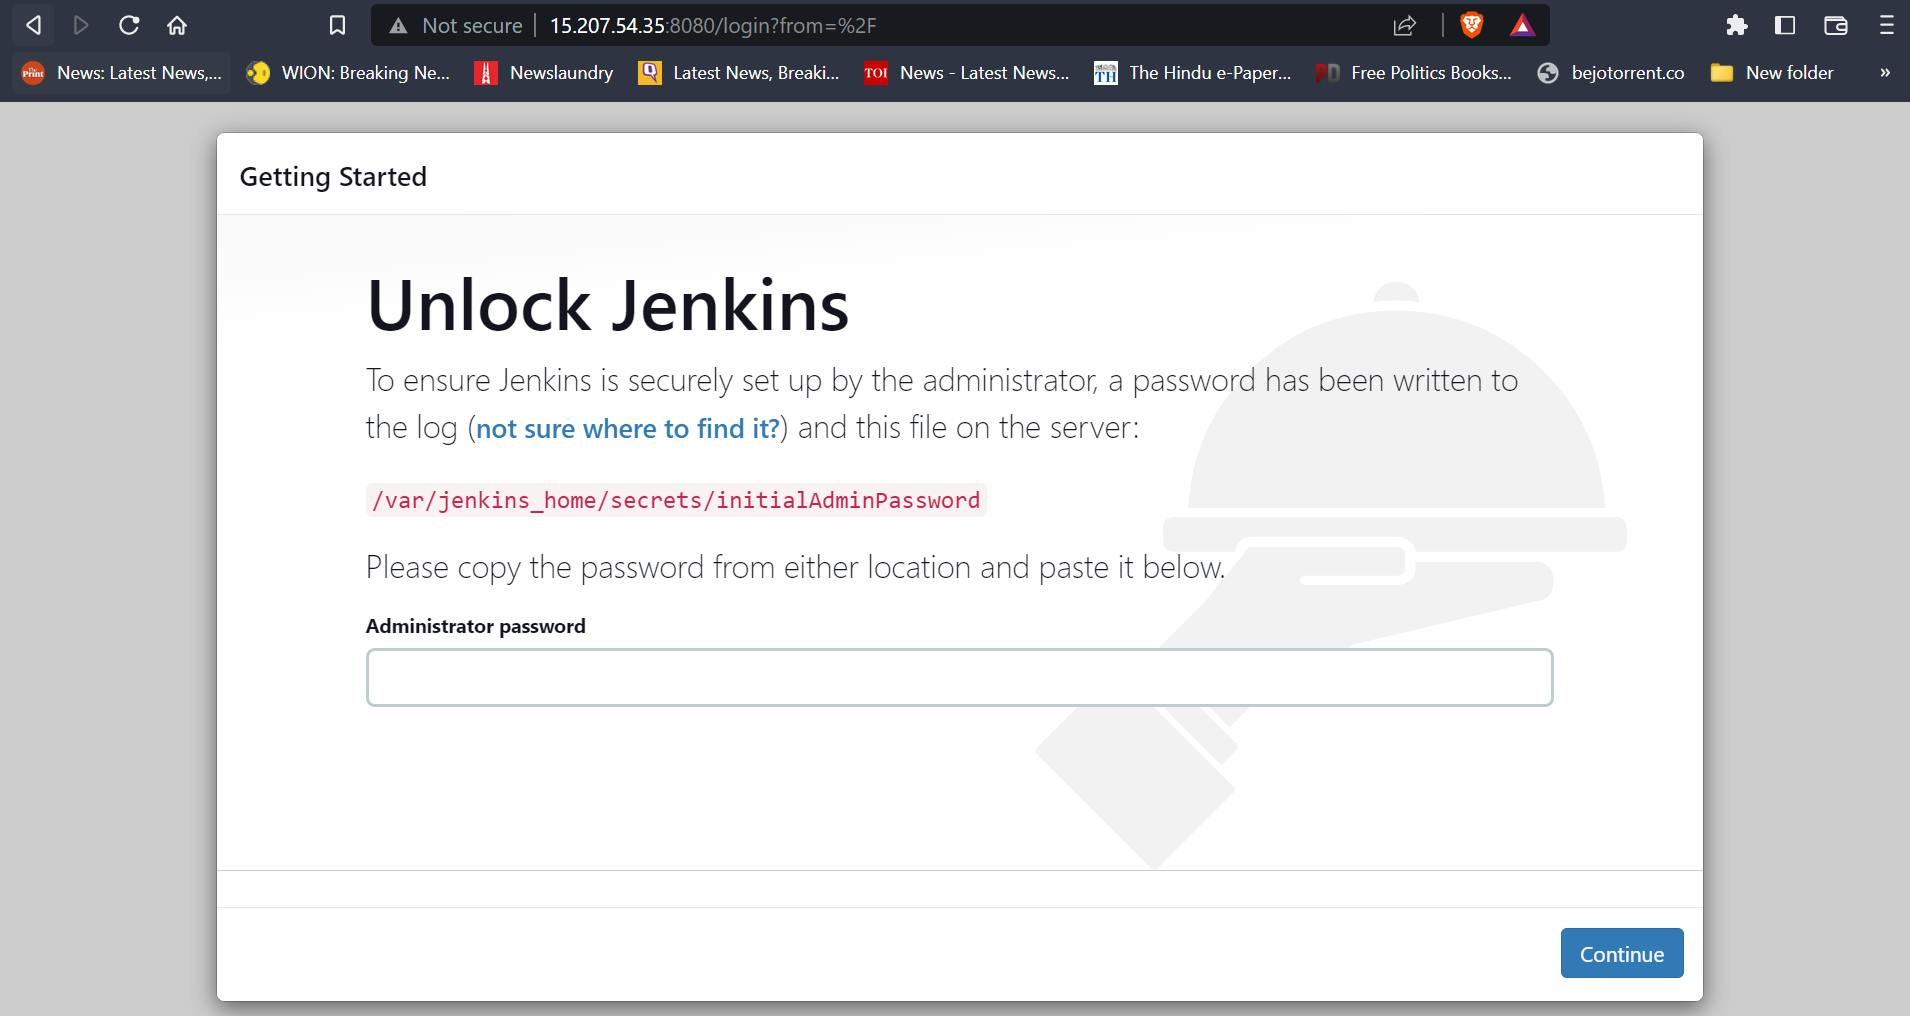
For the administrator password; enter the following command
sudo cat /var/jenkins_home/secrets/initialAdminPassword
Enter the password and press continue;
The next page would look like this, click on the blue button and that will automatically install all related plugins that you need
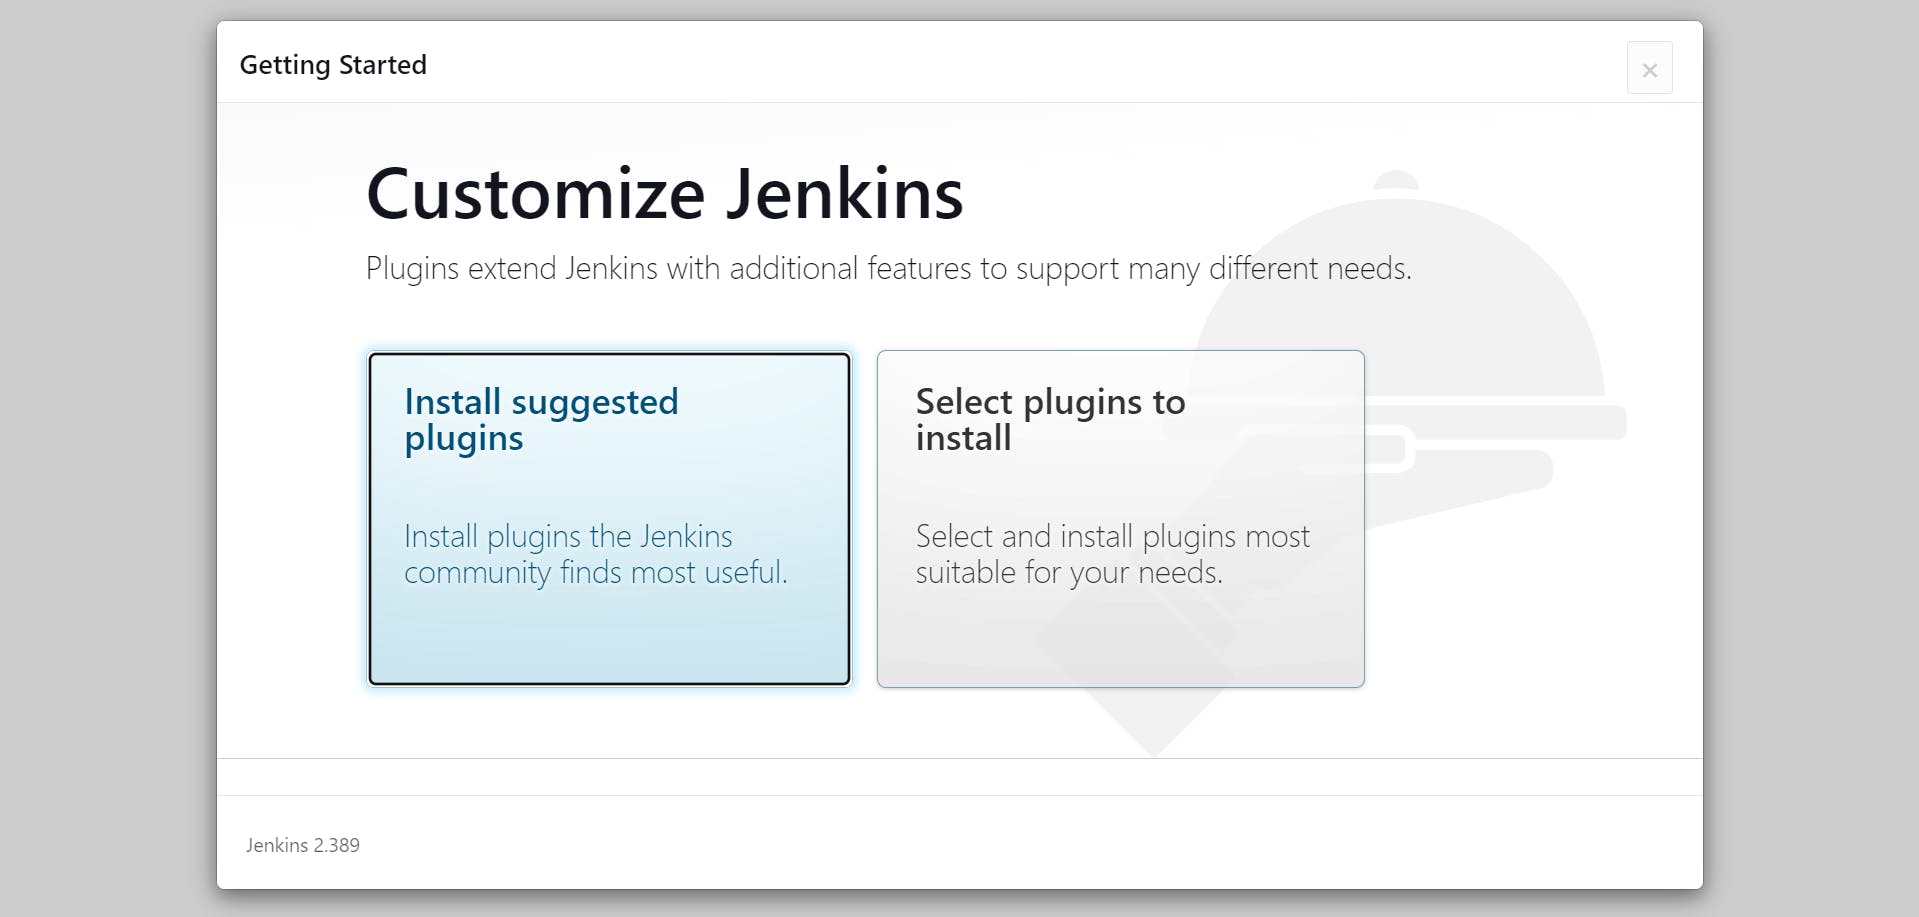
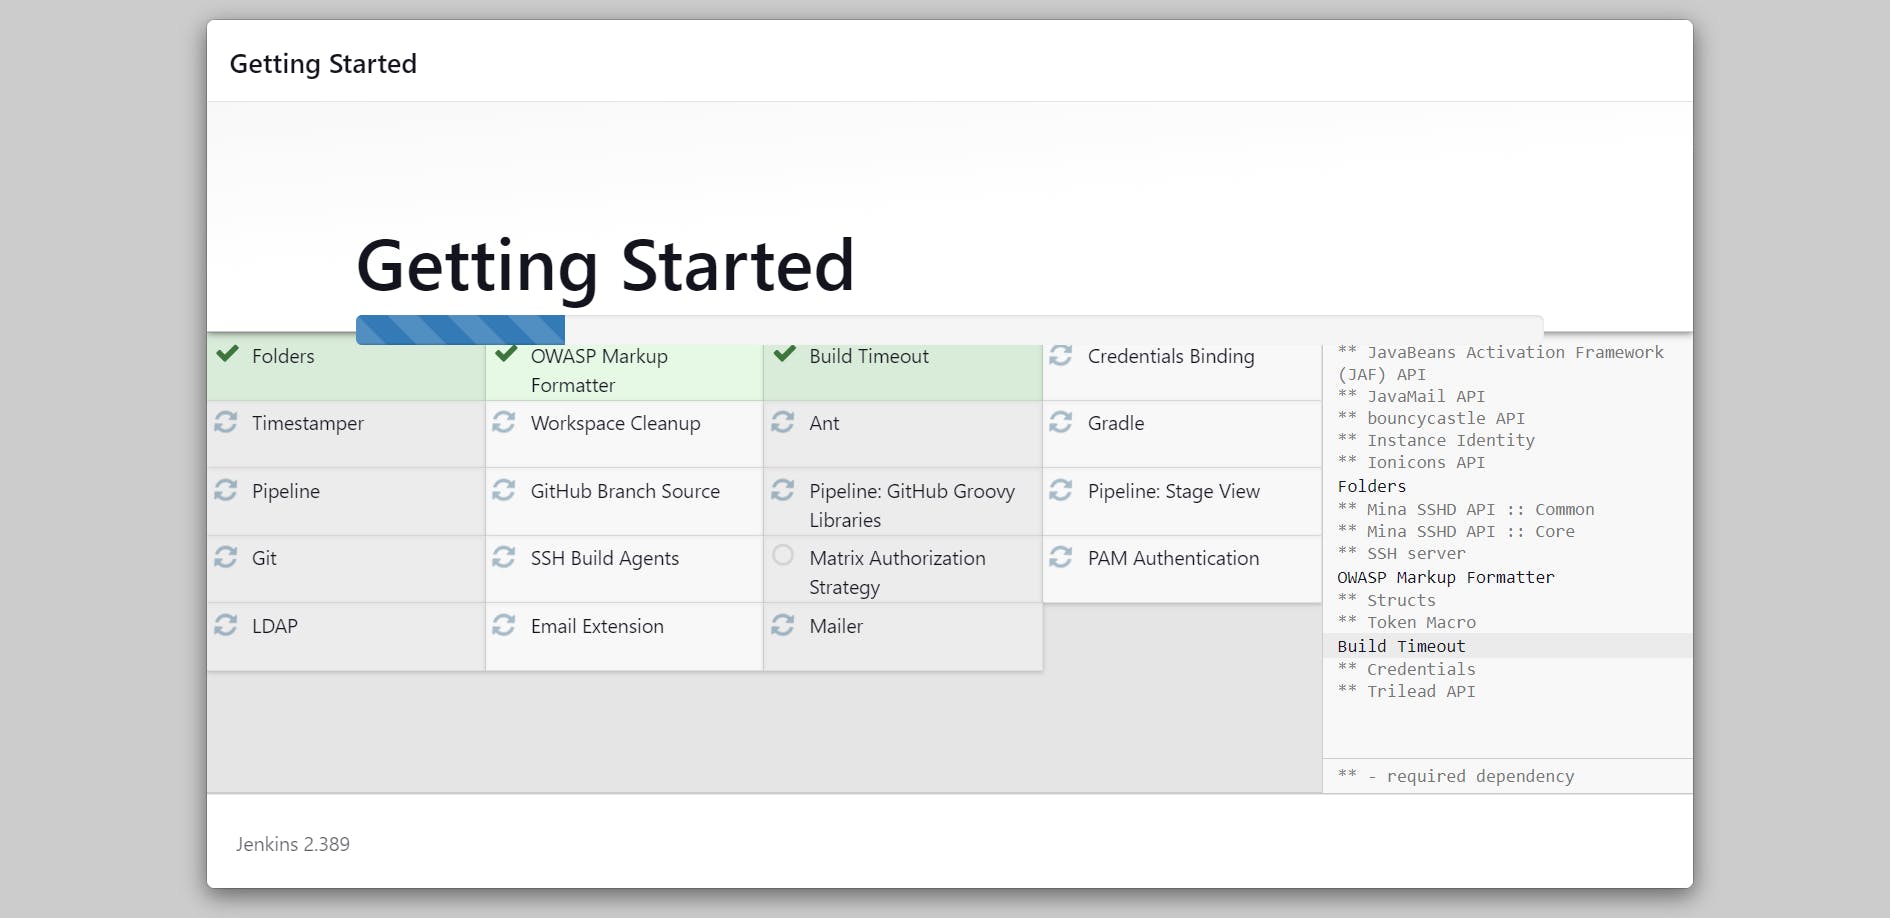
Now, enter the credentials and press save and continue
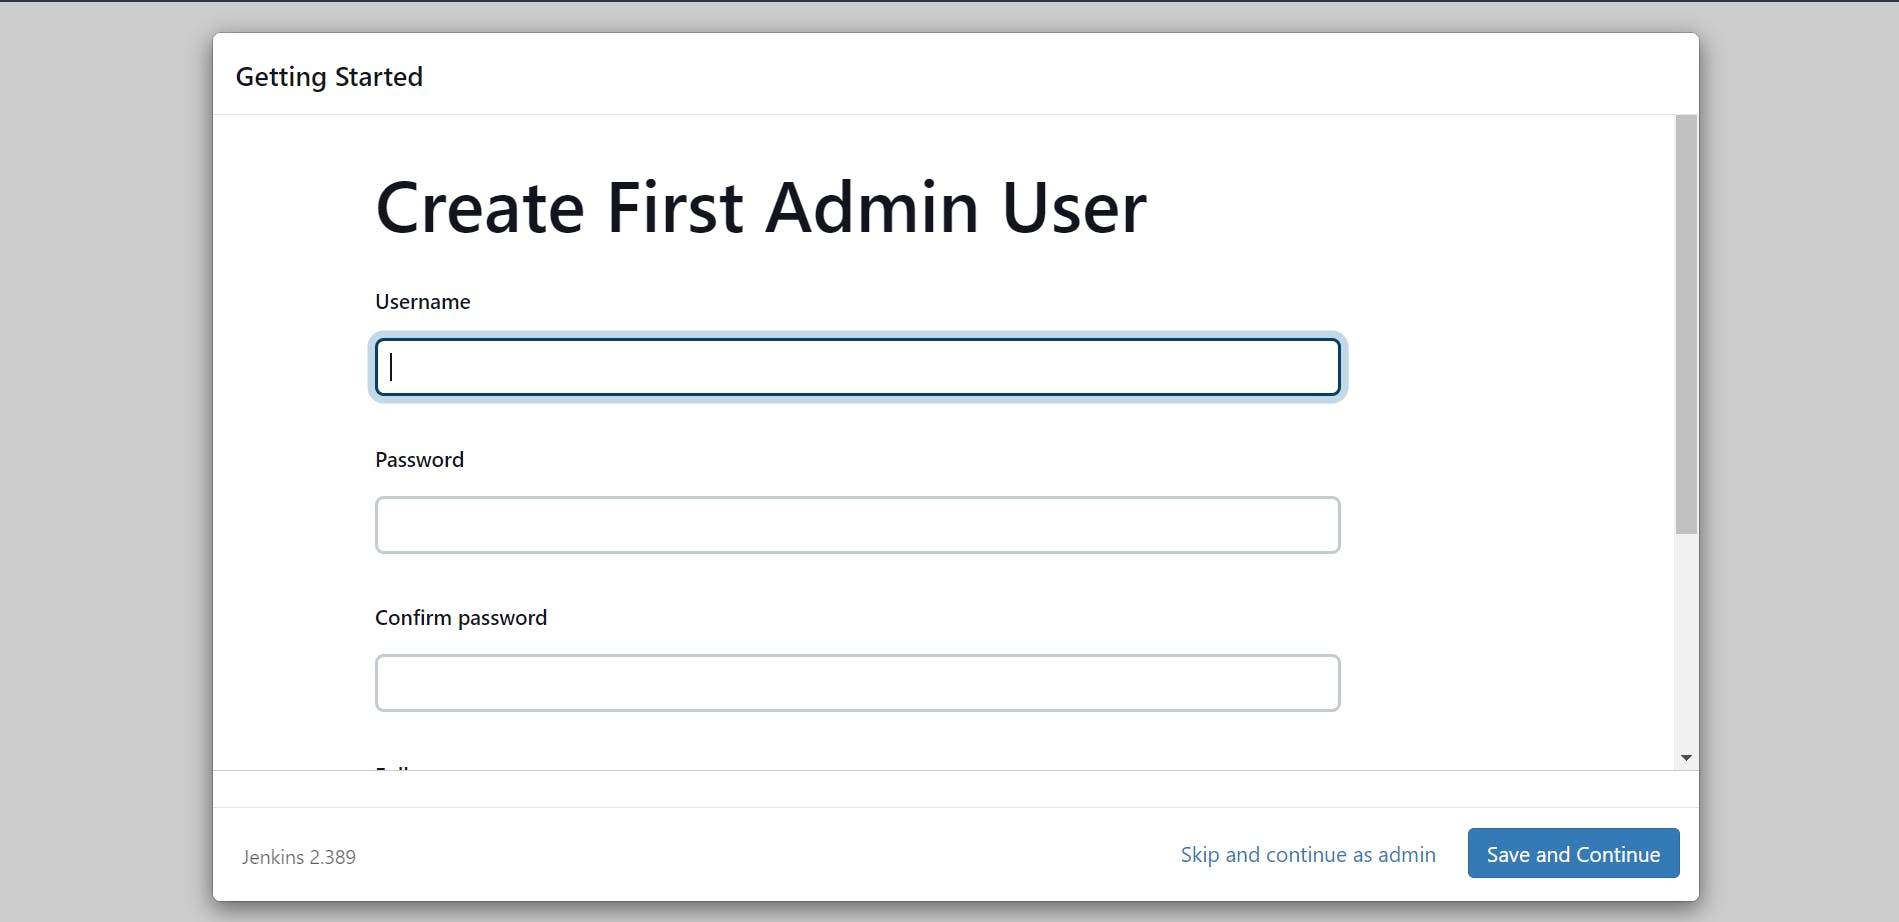
Now, you are at the Dashboard of Jenkins; it might look like this
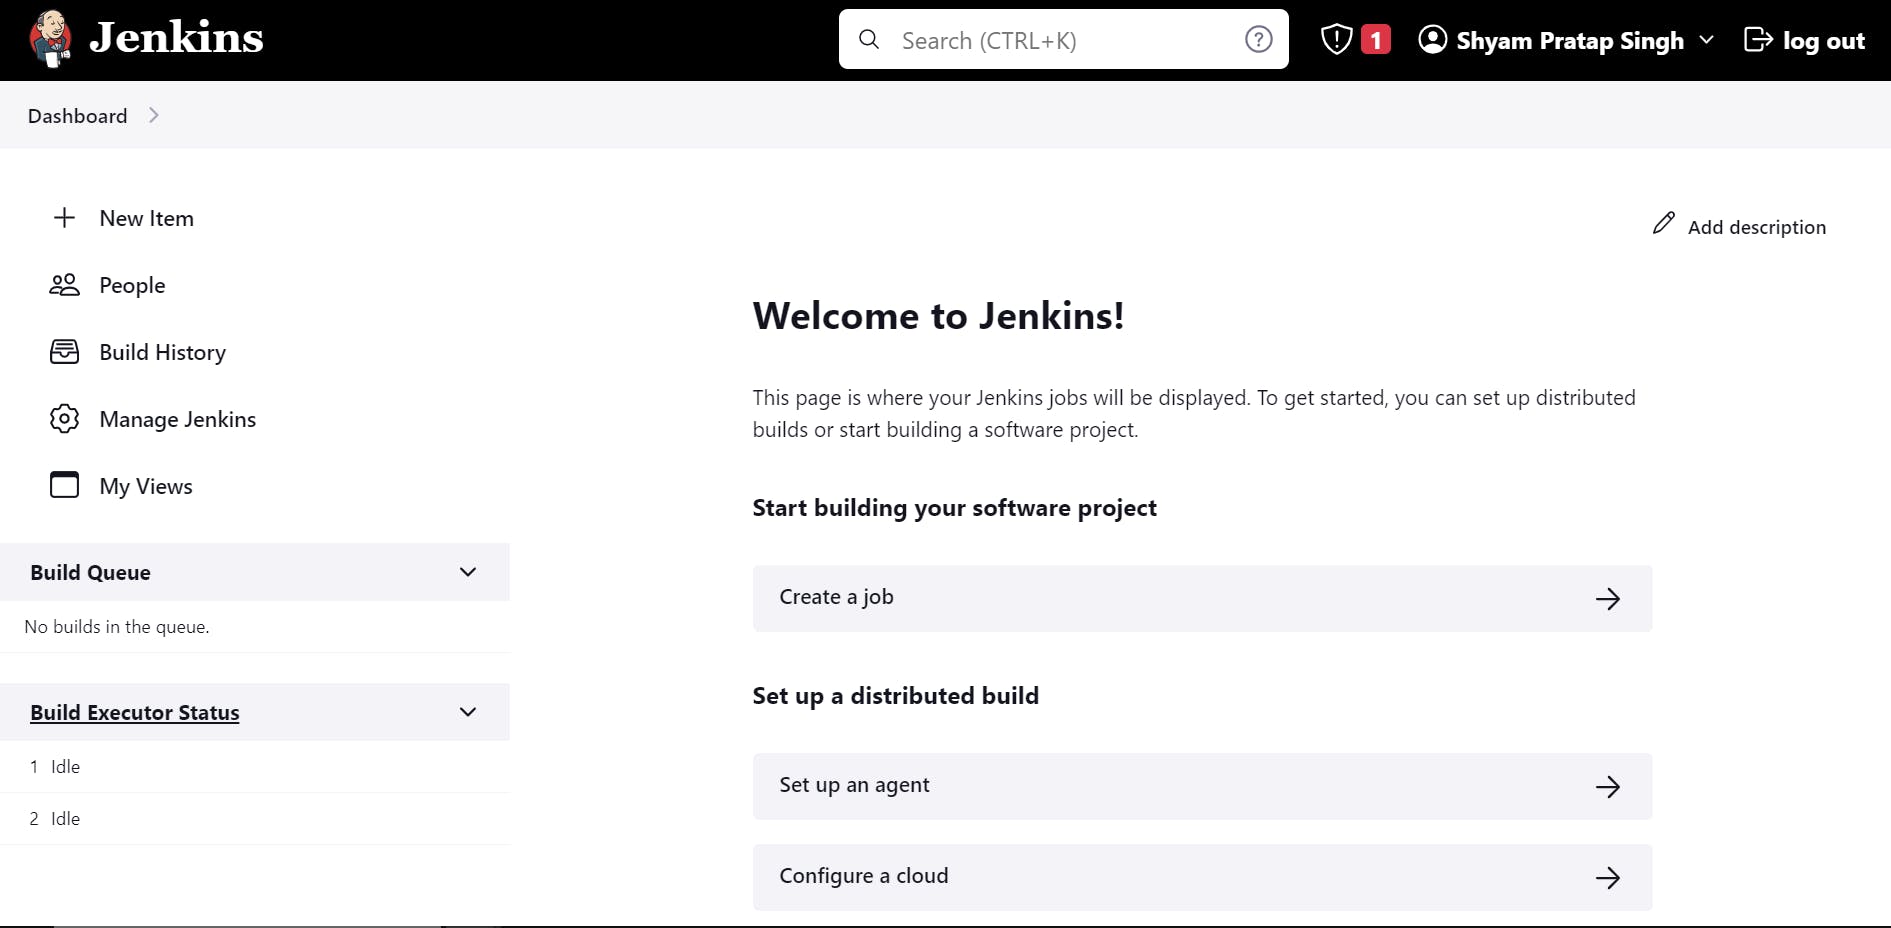
Step 3, Set up an agent for pipelines in Jenkins
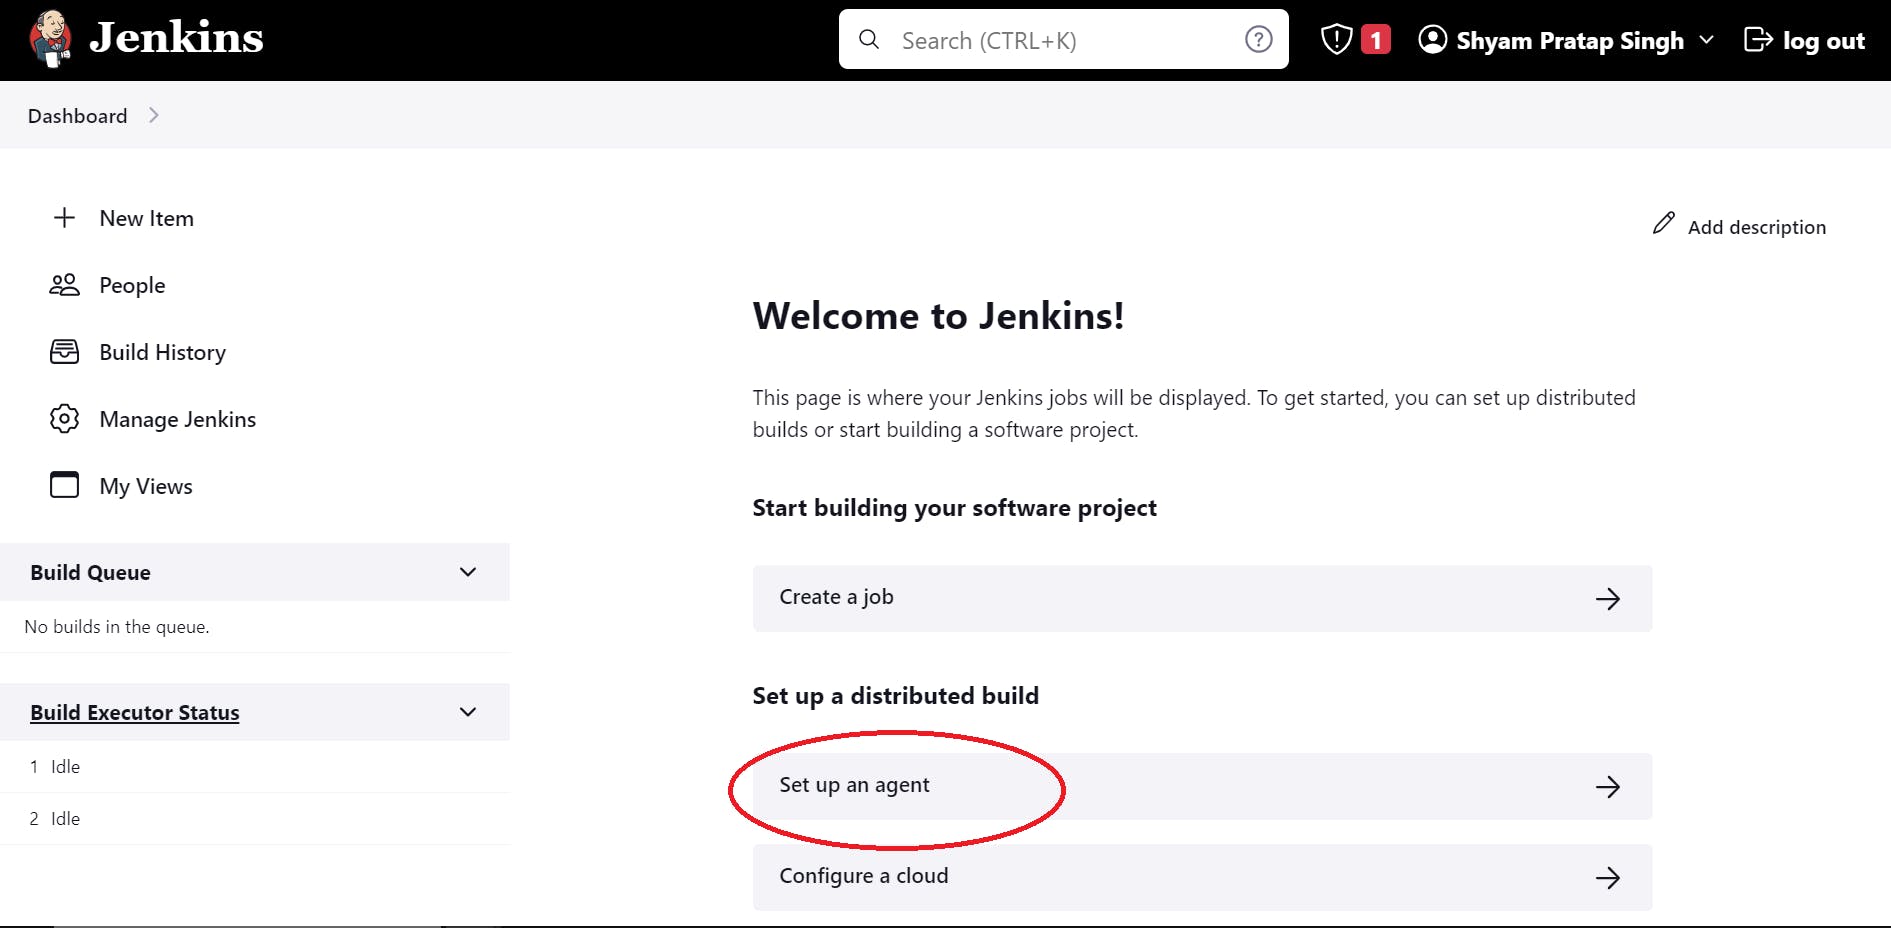
On Jenkins Dashboard, click on set up an agent to create a node; A node creates a separate environment for your pipeline.
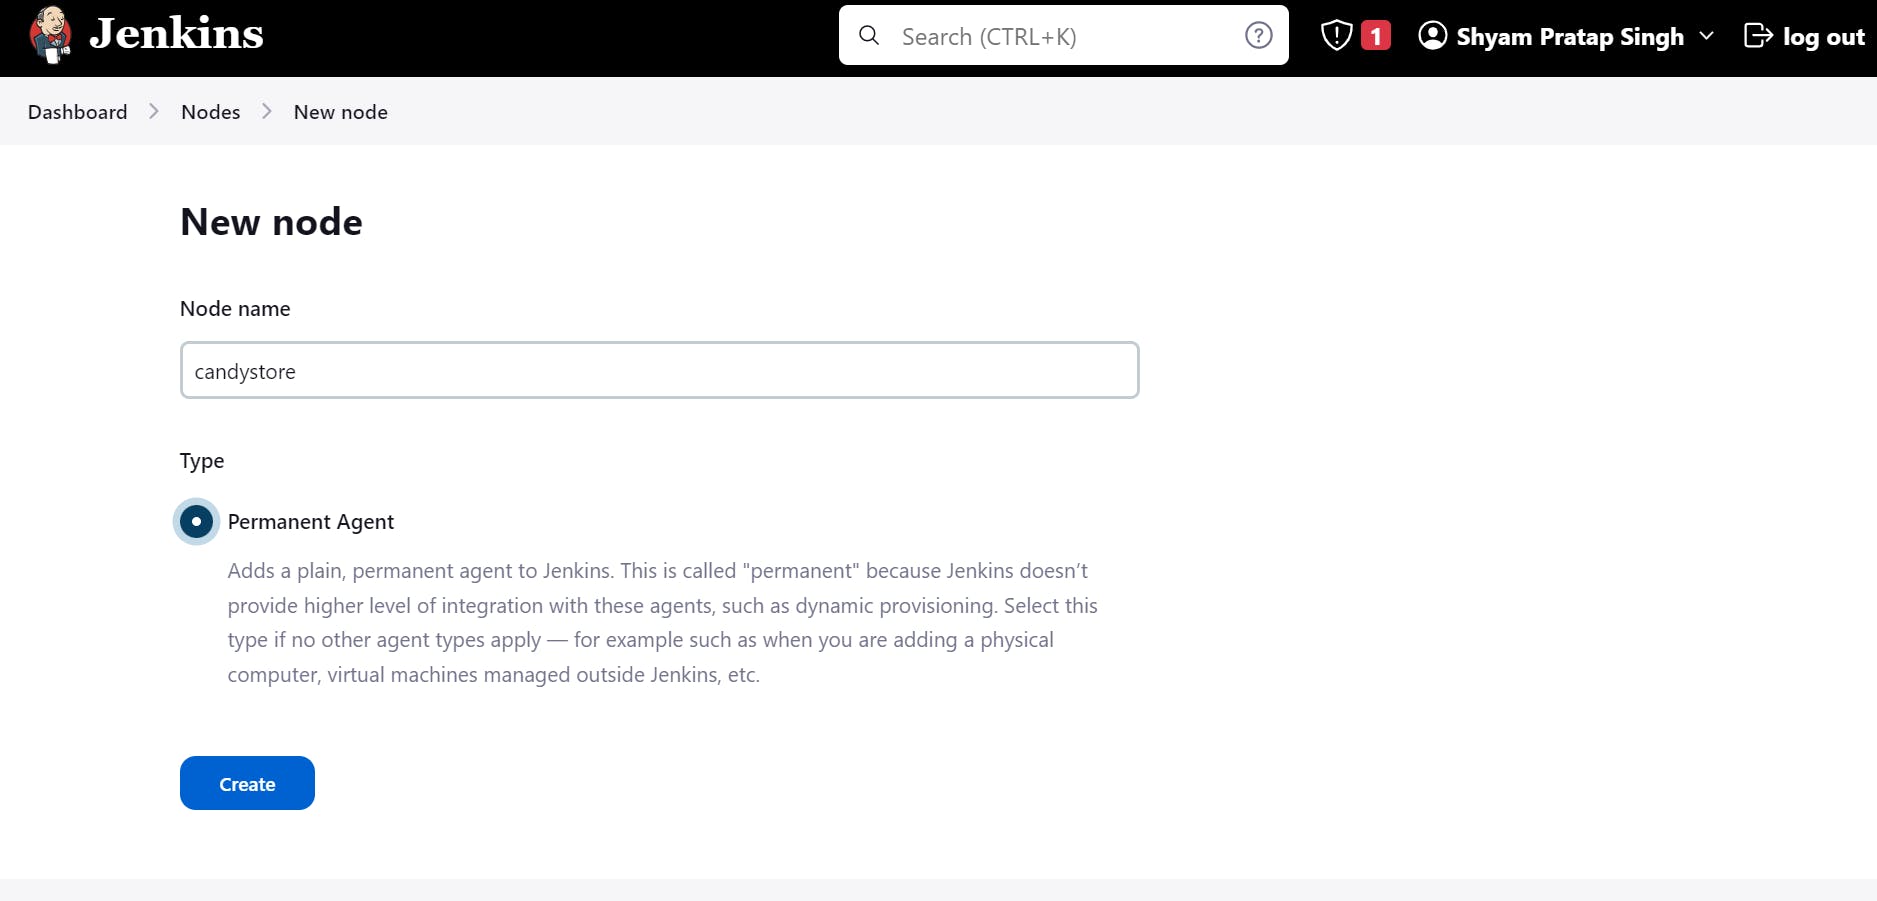
Enter node name; select permanent agent and create
Now, the Configuration panel would open; Enter the details name, and description (optional) and then select web socket. Leave everything as default.
Press the save button. Now, your node is ready.
Step 4, GitHub integration
Go to the GitHub Repository of your project and open the settings
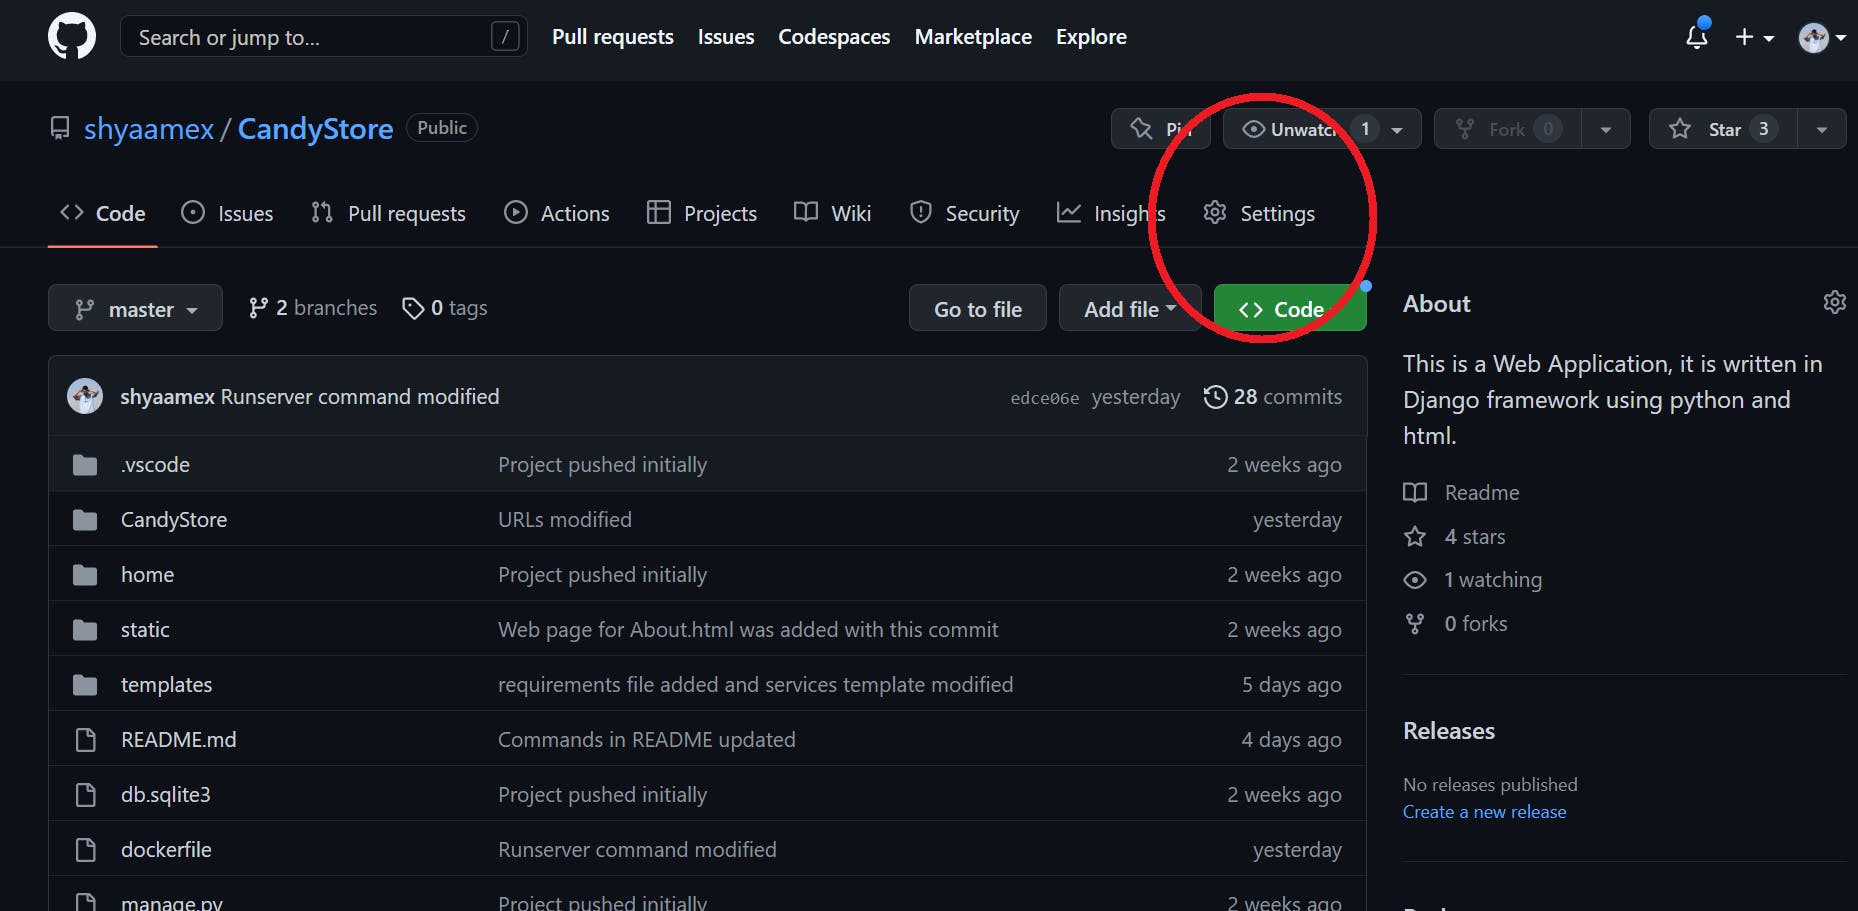
In the settings; select webhooks; at the payload URL enter http://<ip-of-your-server>:8080//github-webhook/ . Here, port 8080 will link this repo to our Jenkins. Copy this secret Personal Access Token.
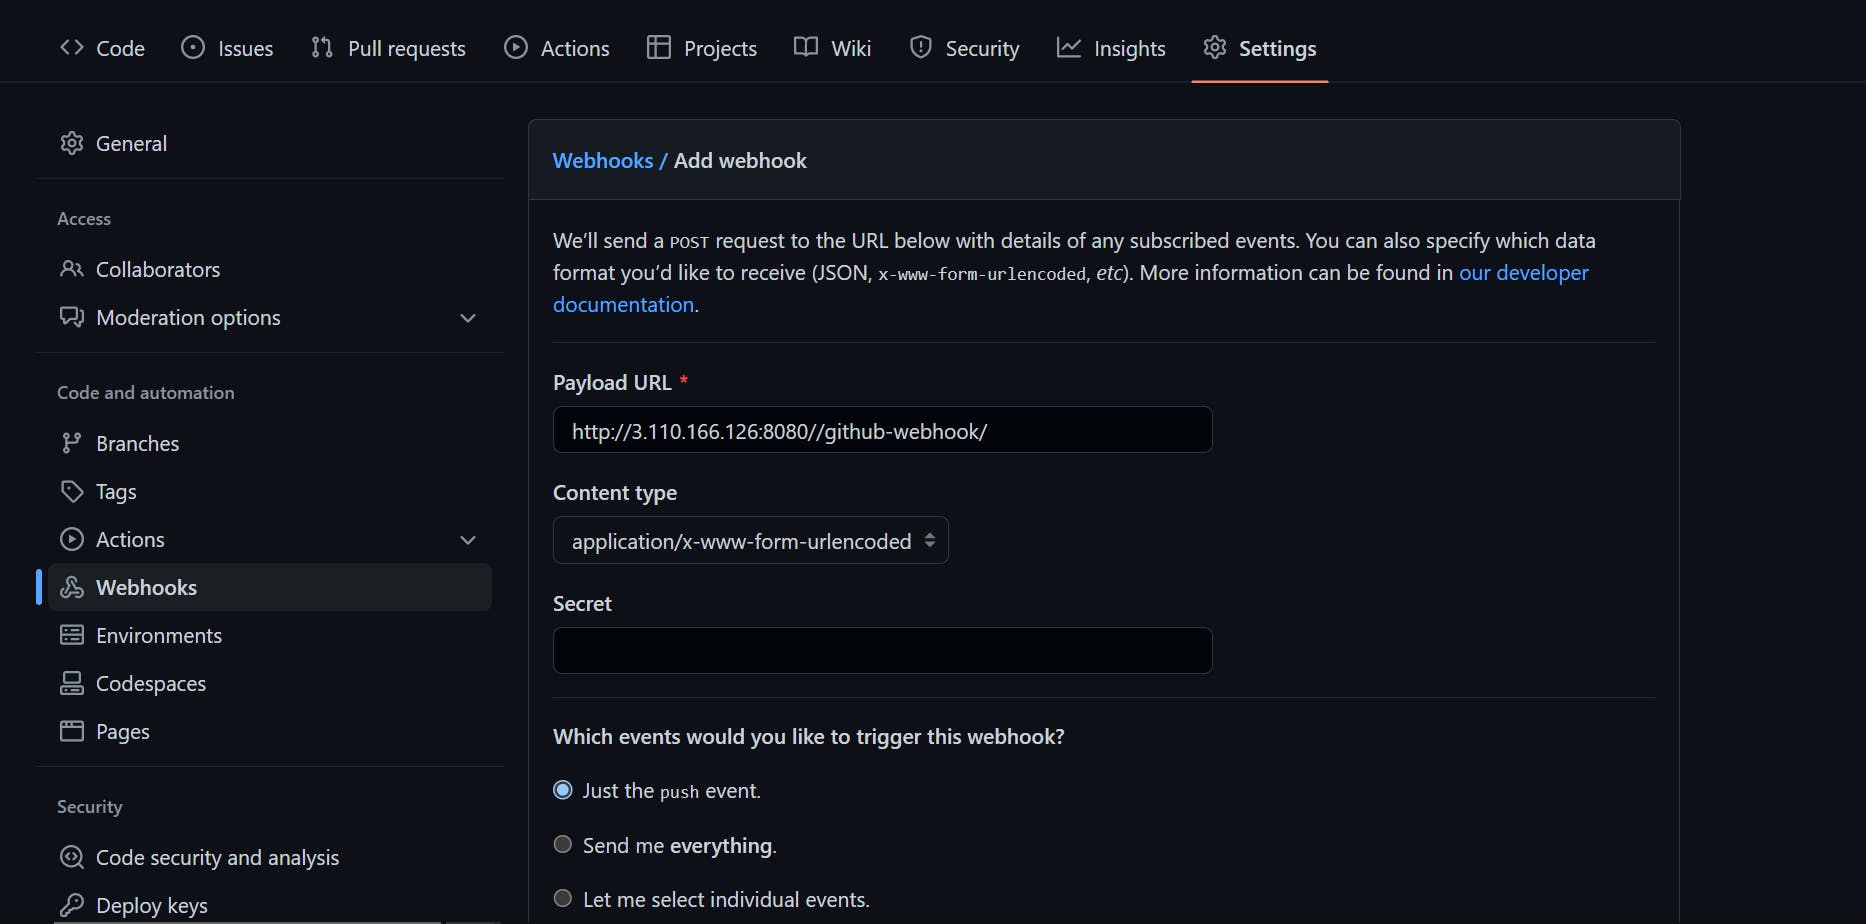
Leave everything as default and click on Add webhook at bottom
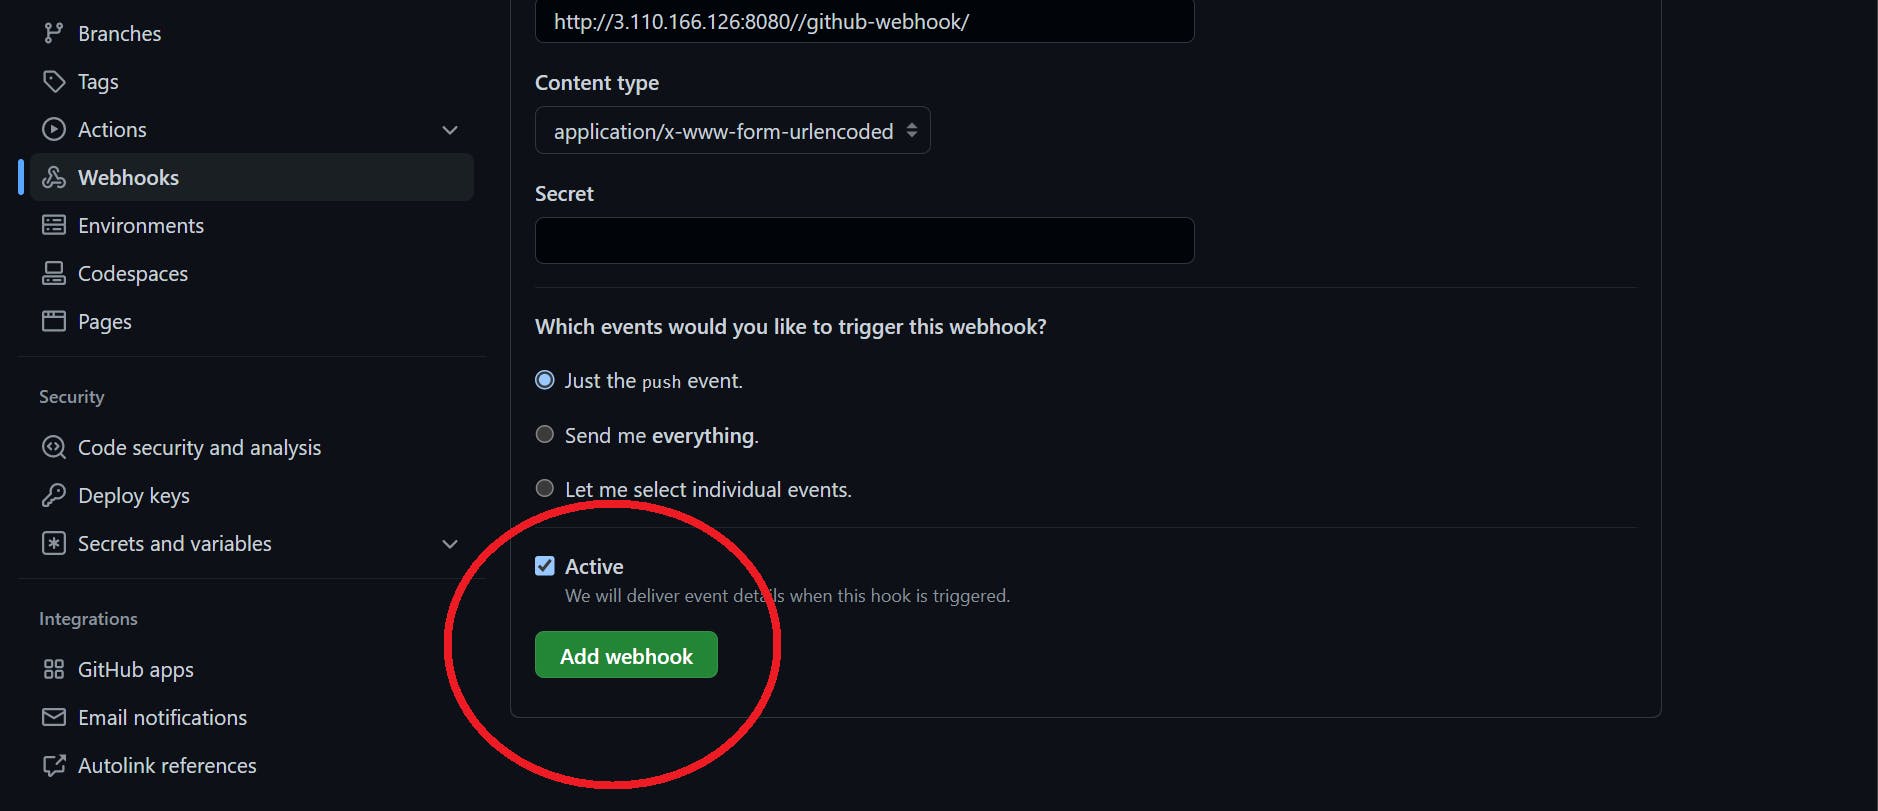
Now, we will use this Personal Access Token during the configuration of the CI/CD pipeline.
Step 5, Configuration of CI/CD pipeline
Click on create a job, to create and configure your pipeline.
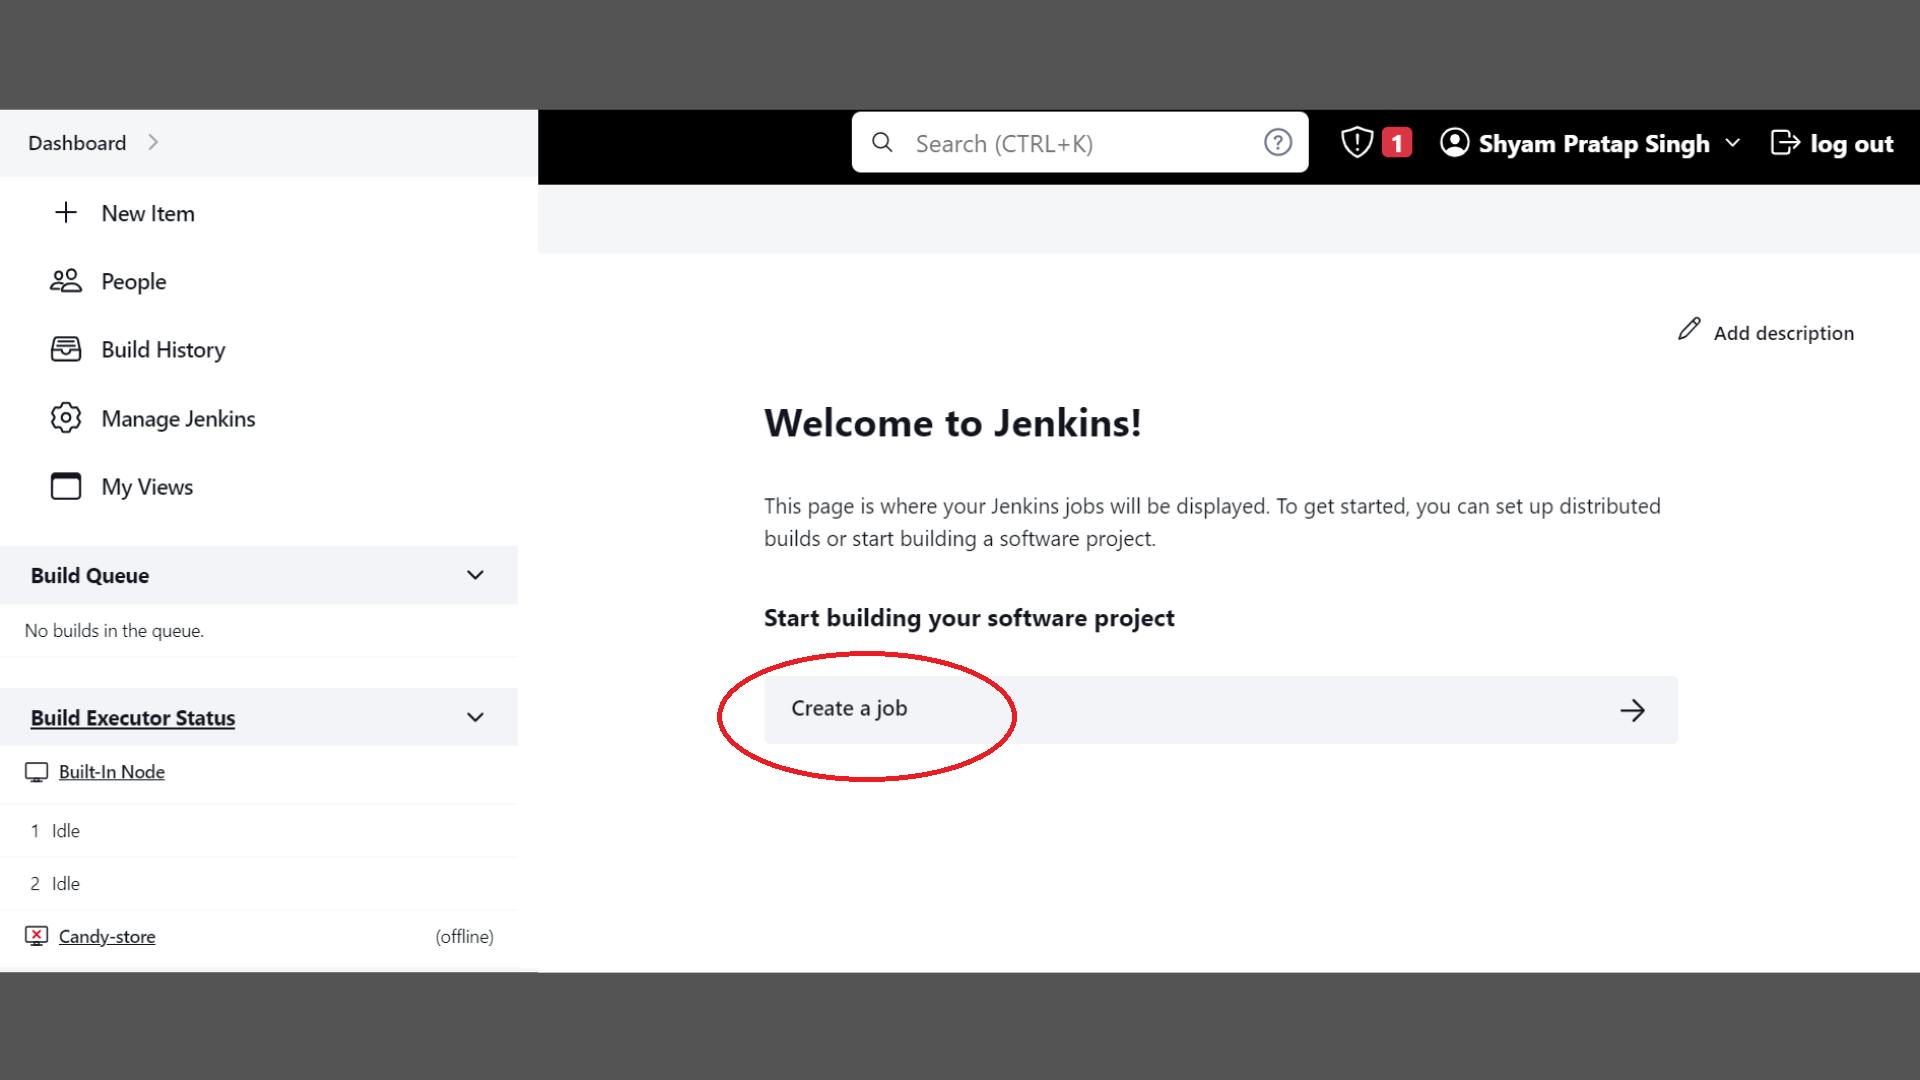
Now, the configuration panel for your job (CI/CD pipeline) would open
Here, you can add a Description about the pipeline
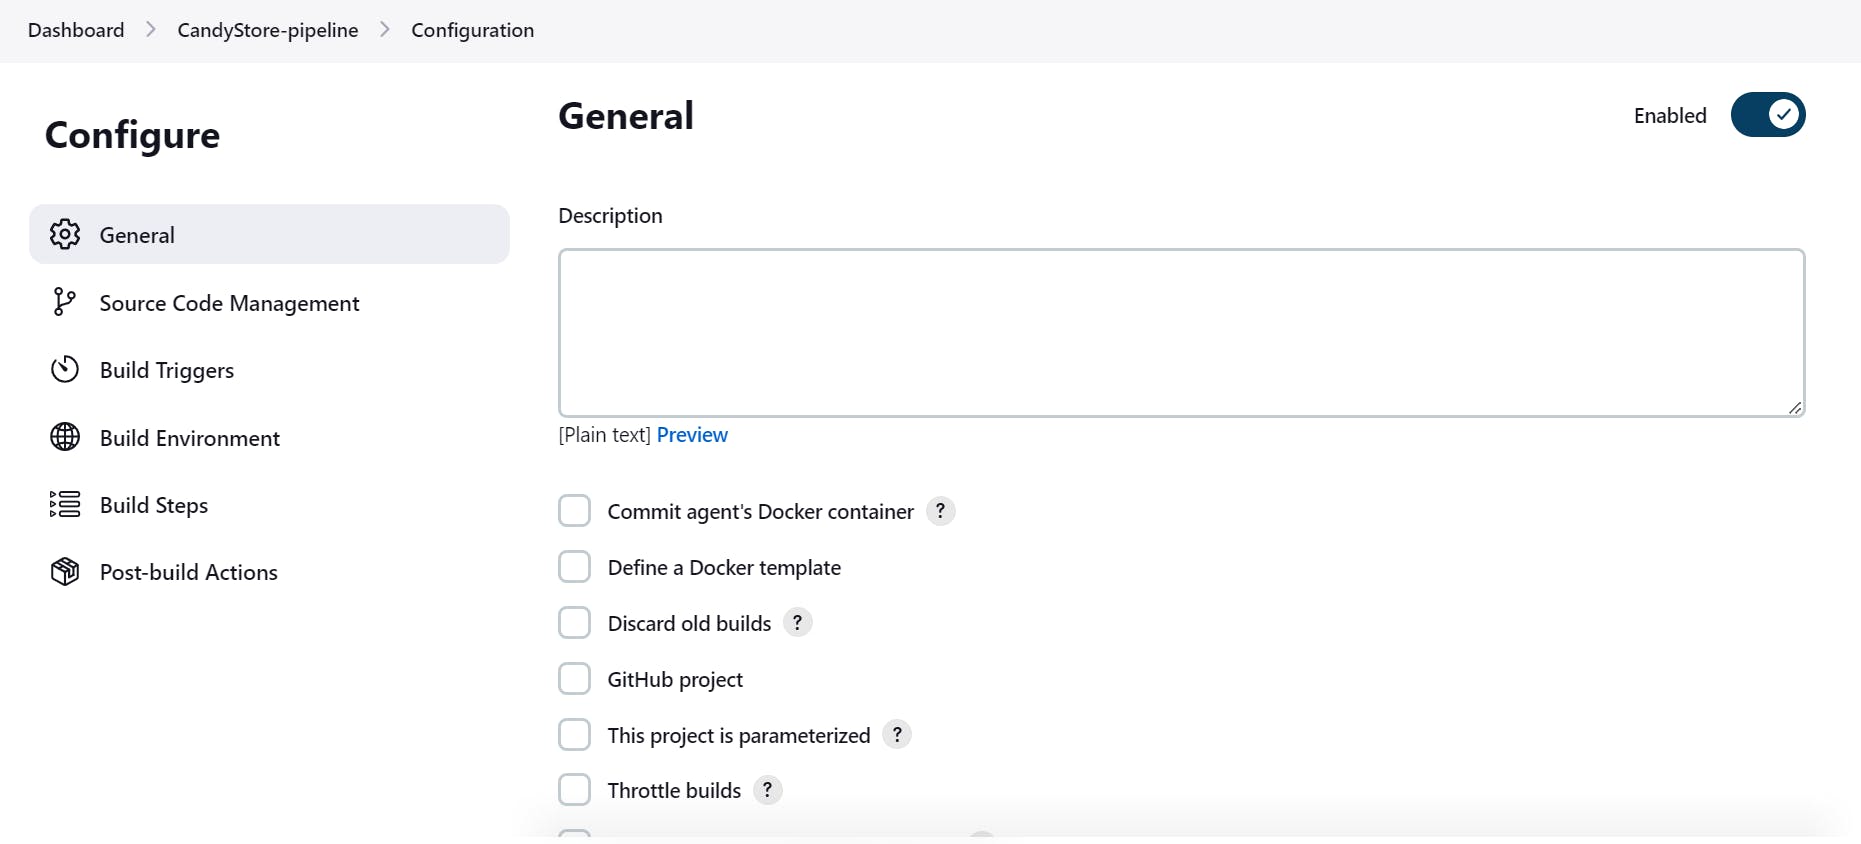
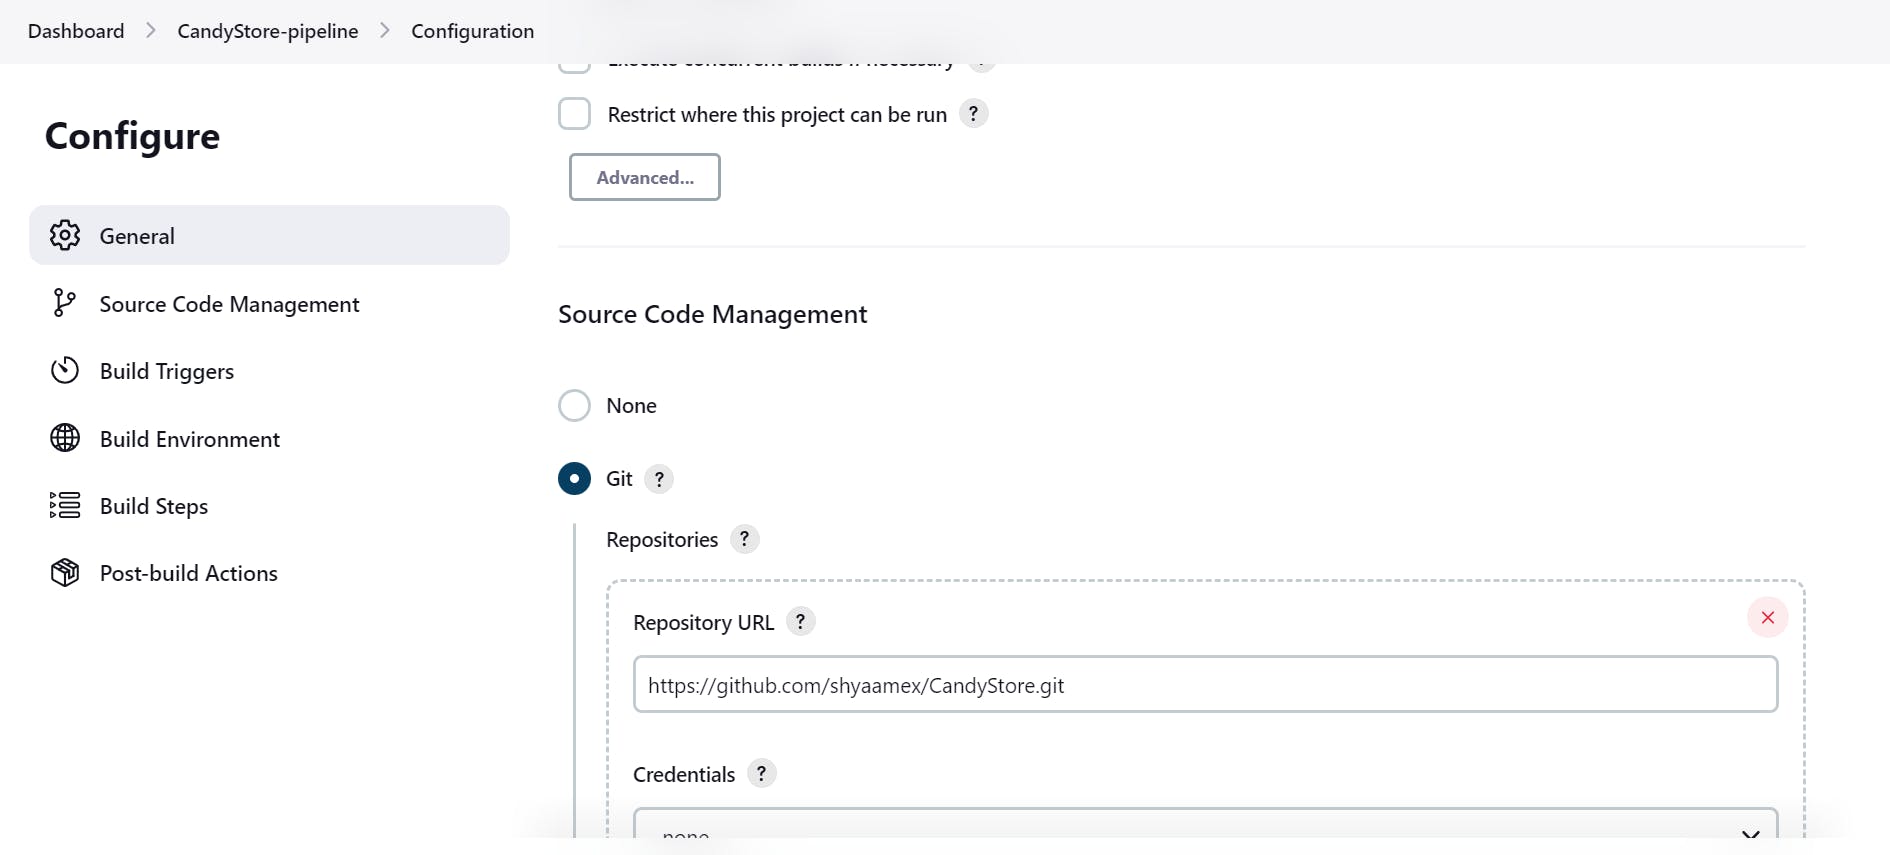
As we are accessing our code from GitHub directly; select git in Source Code Management; add URL of the repository
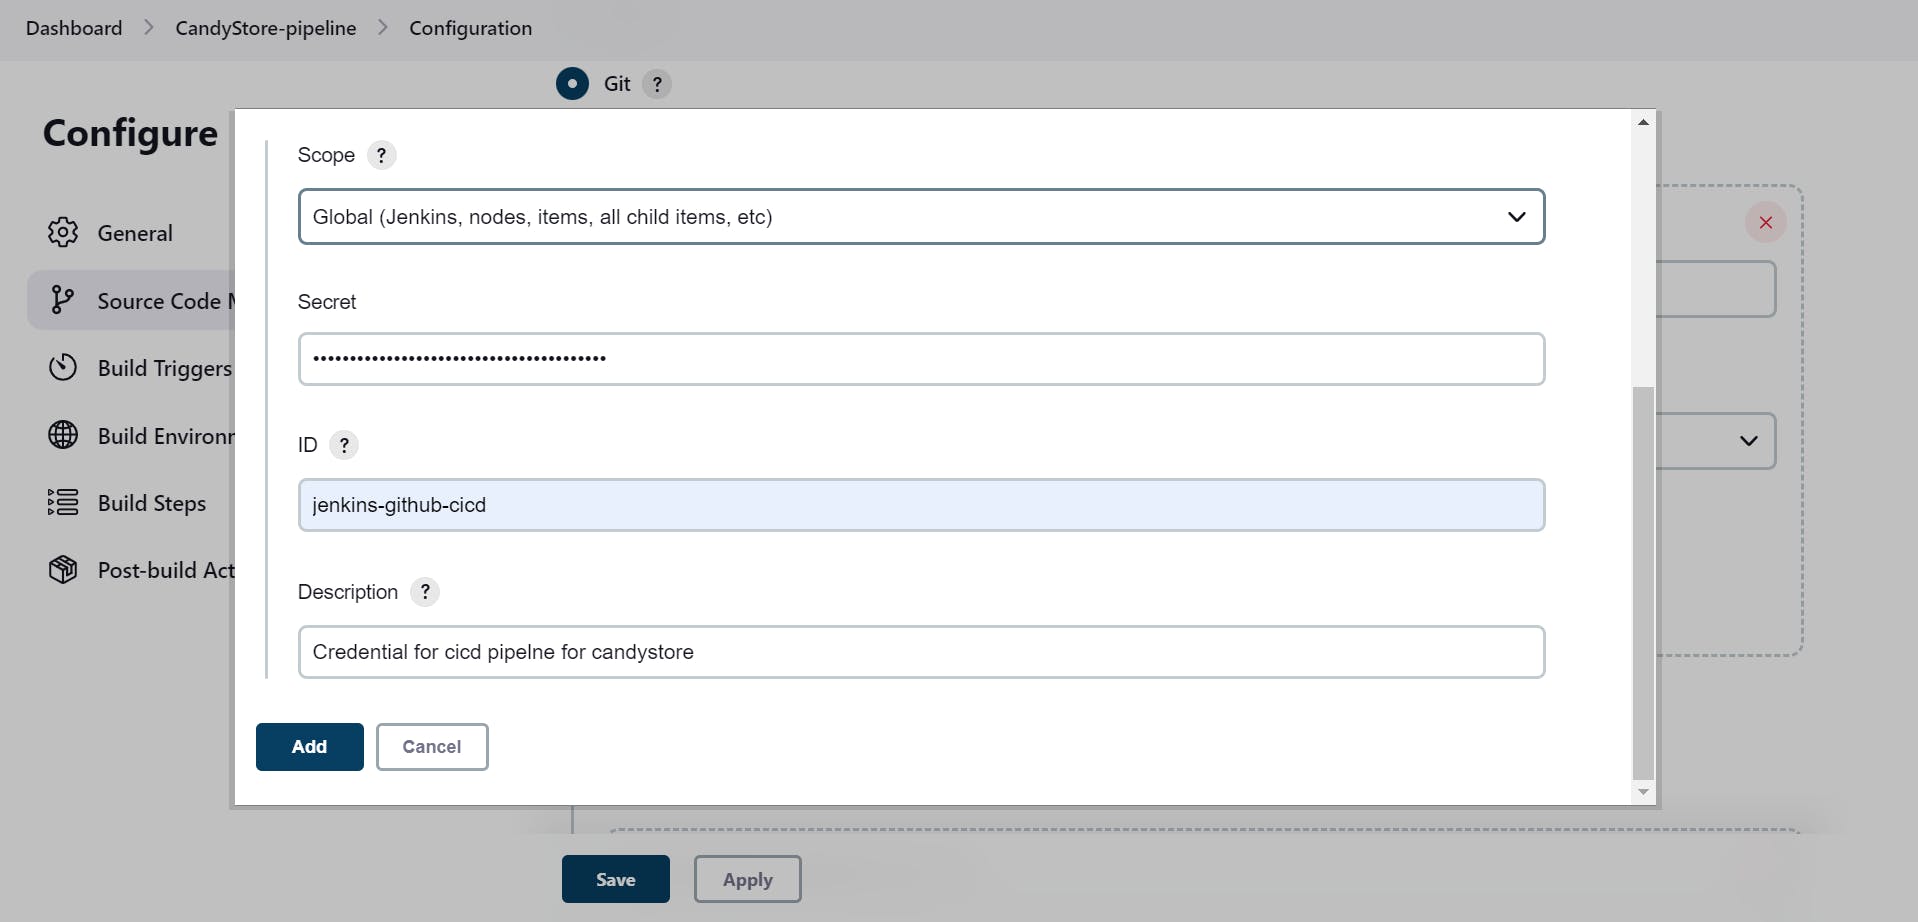
Leave domain as default; in kind select secret text from the dropdown menu leave the scope global and add GitHub Token as secret text and add id (must be unique).

Add a description and click on add button, and then select id (that we created) from the dropdown menu
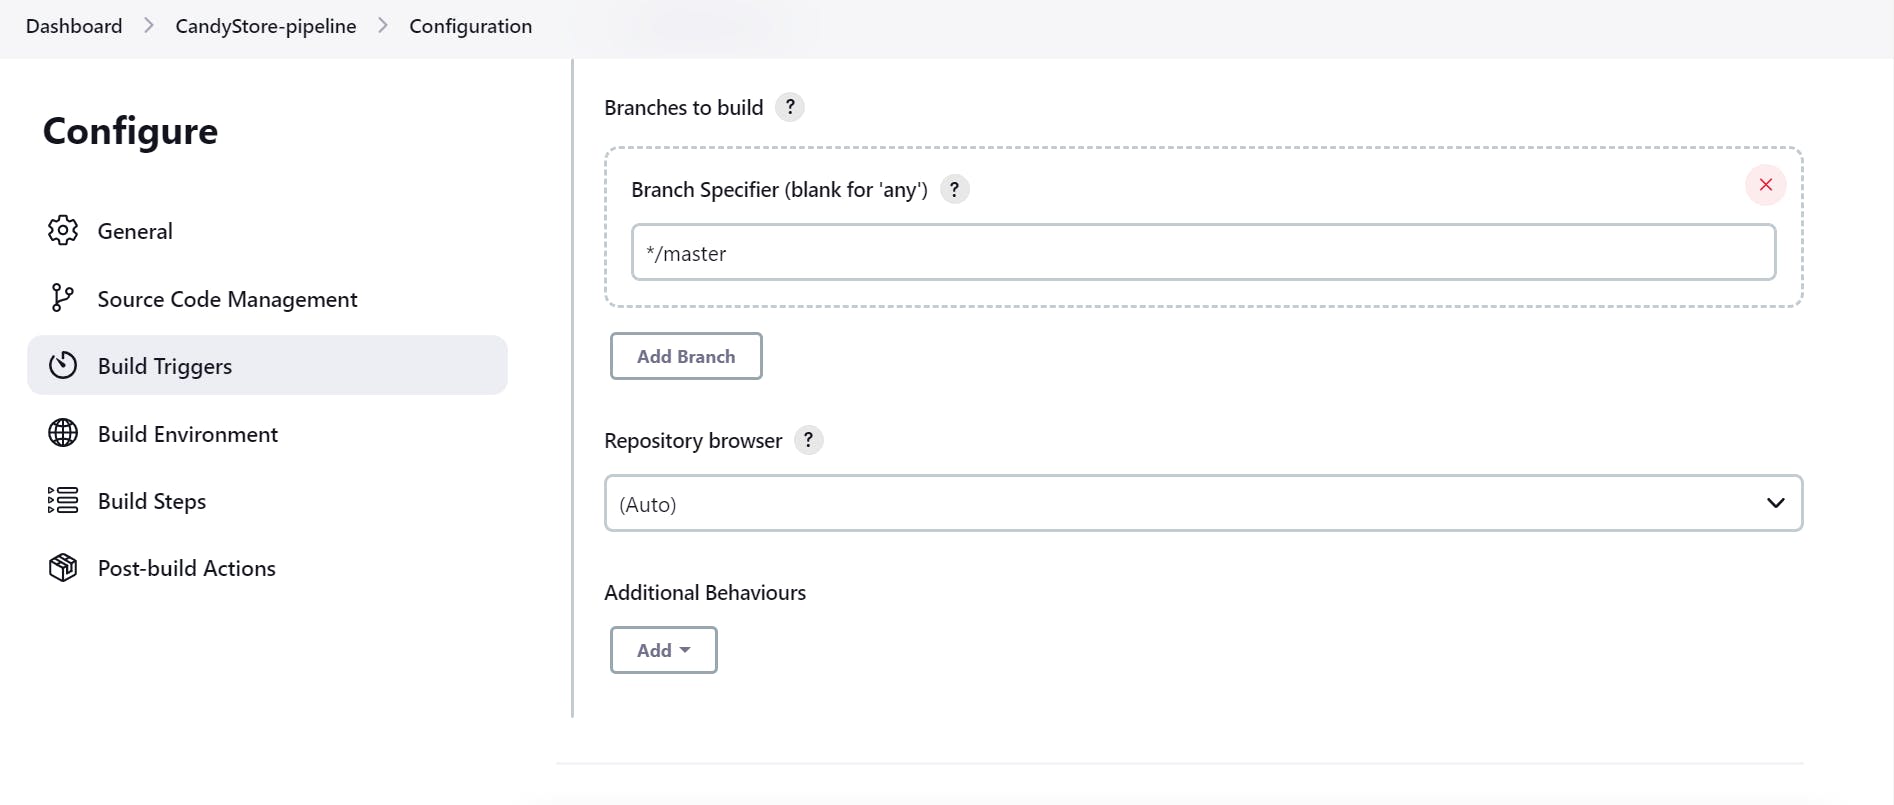
Add your branch name; if and only if you have another branch else leave it as default.
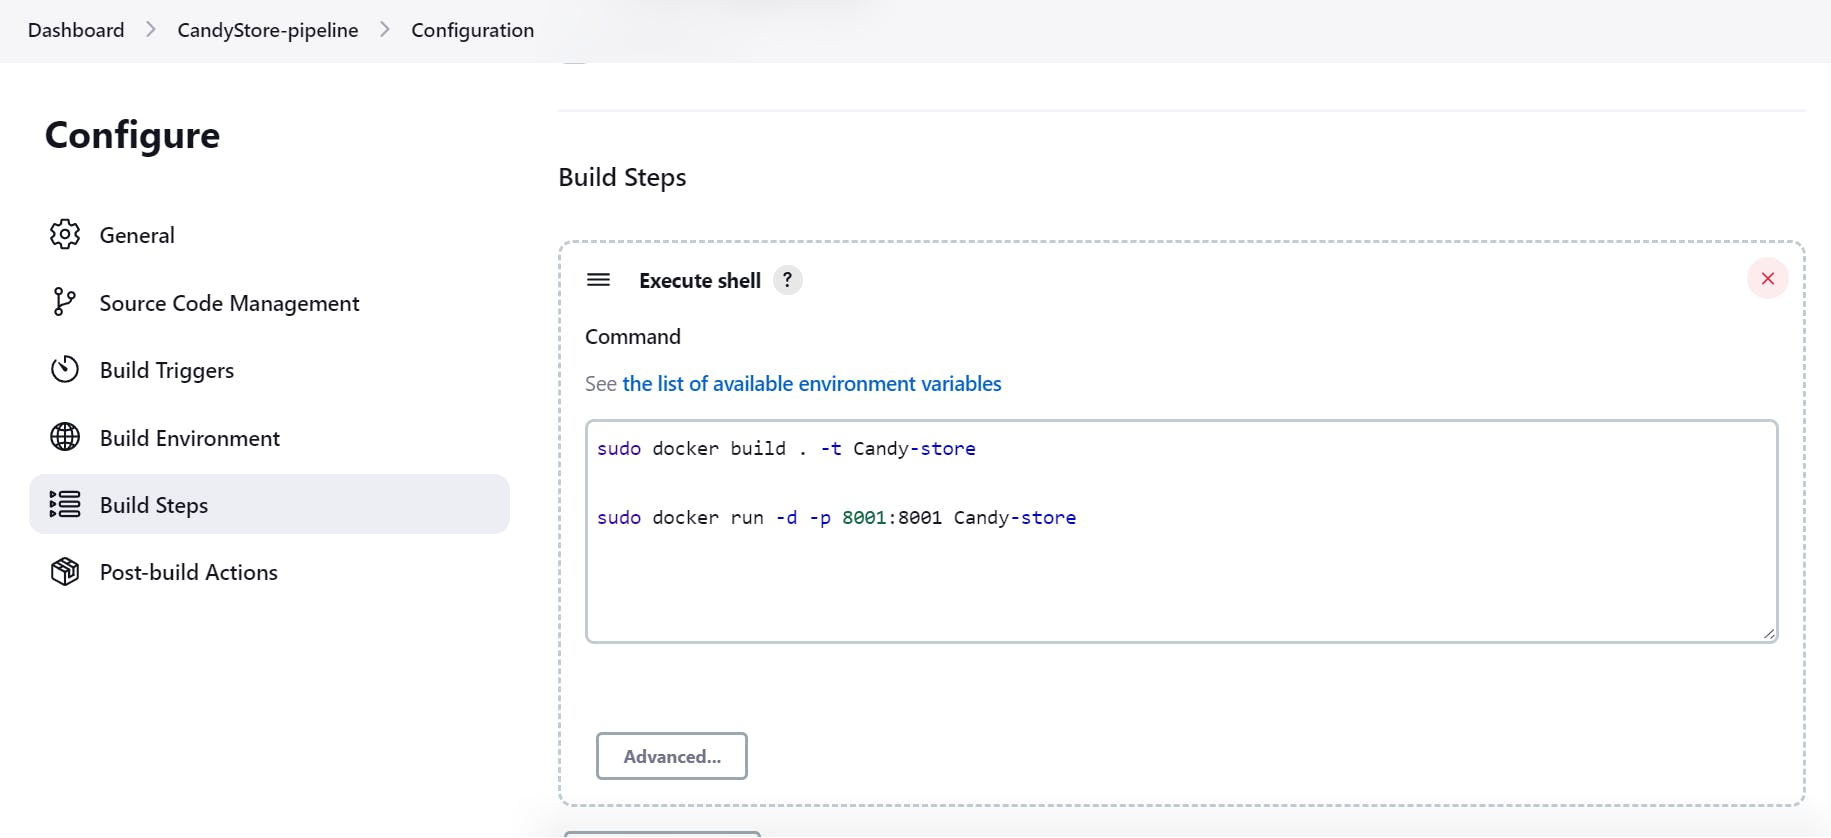
In build steps; select execute shell. Here, these commands will create a docker image from dockerfile(already in the code) and then run this dockerized code on port number 8001. Afterward click on the save button.
Step 6, Build Pipeline
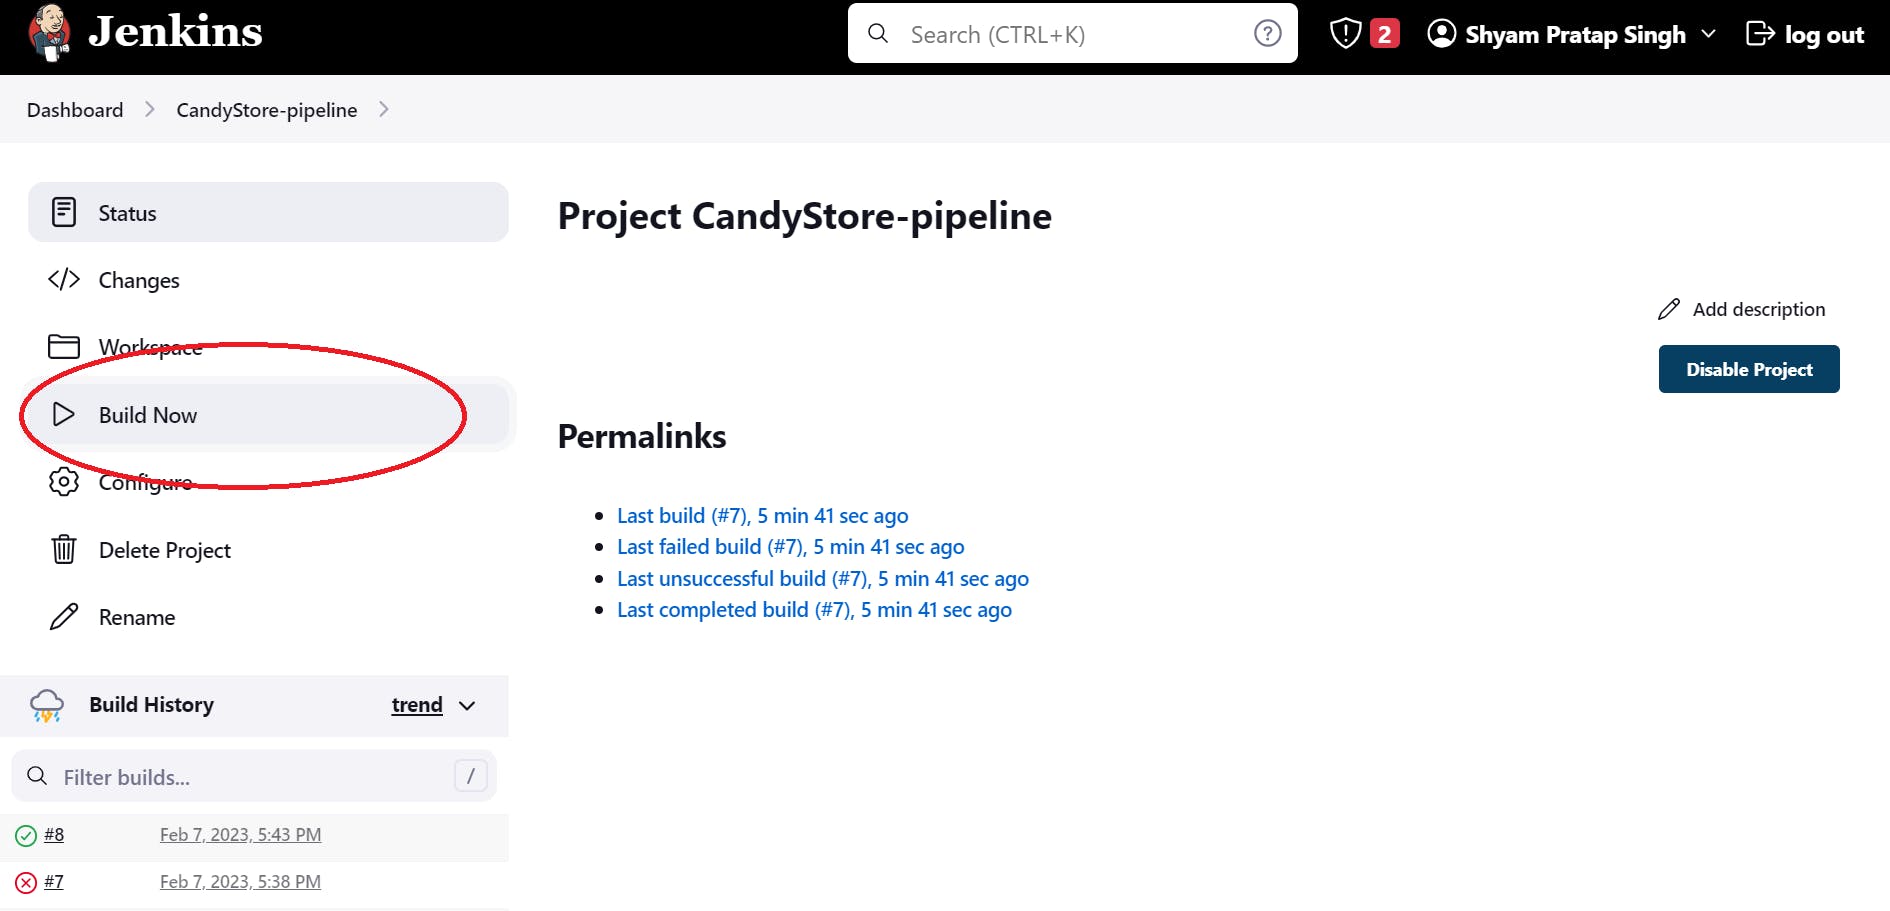
After the configuration is saved click on Build Now, to build the pipeline.
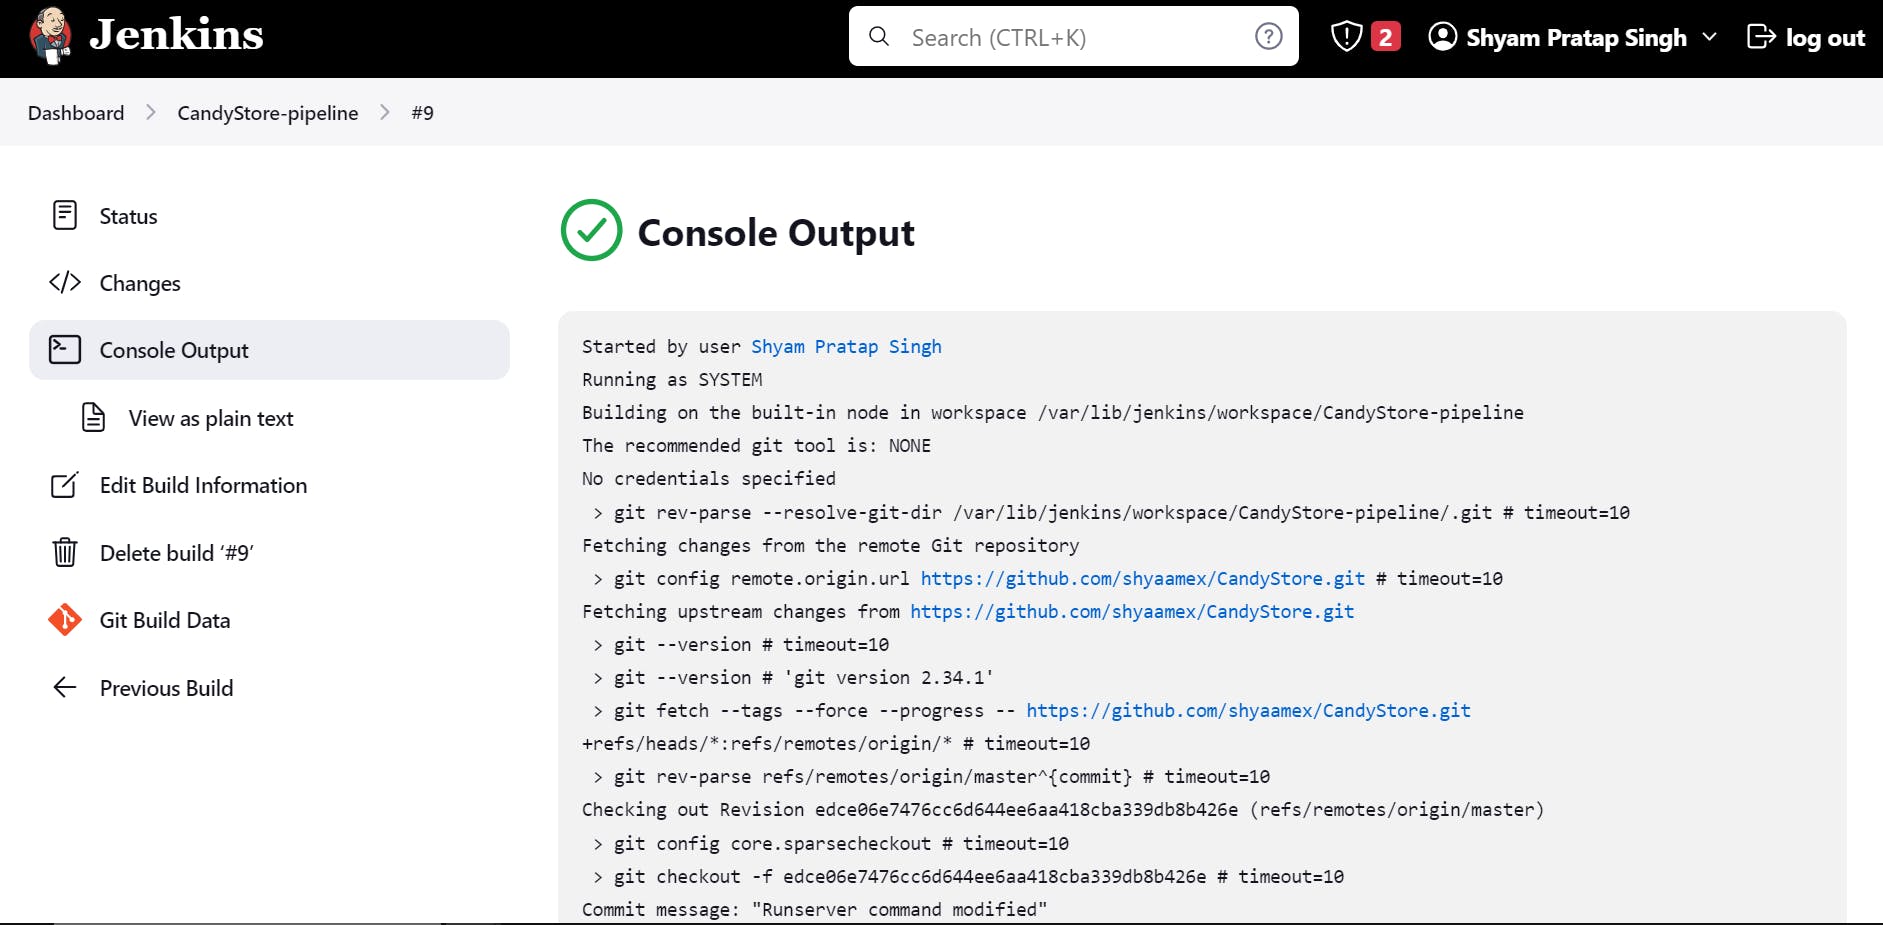
After rectifying all errors the console output would look like this; The build is successful and we can access the project at port 8001
Step 7, Checkout the deployed project
This is how our deployed project would look like at port 8001:

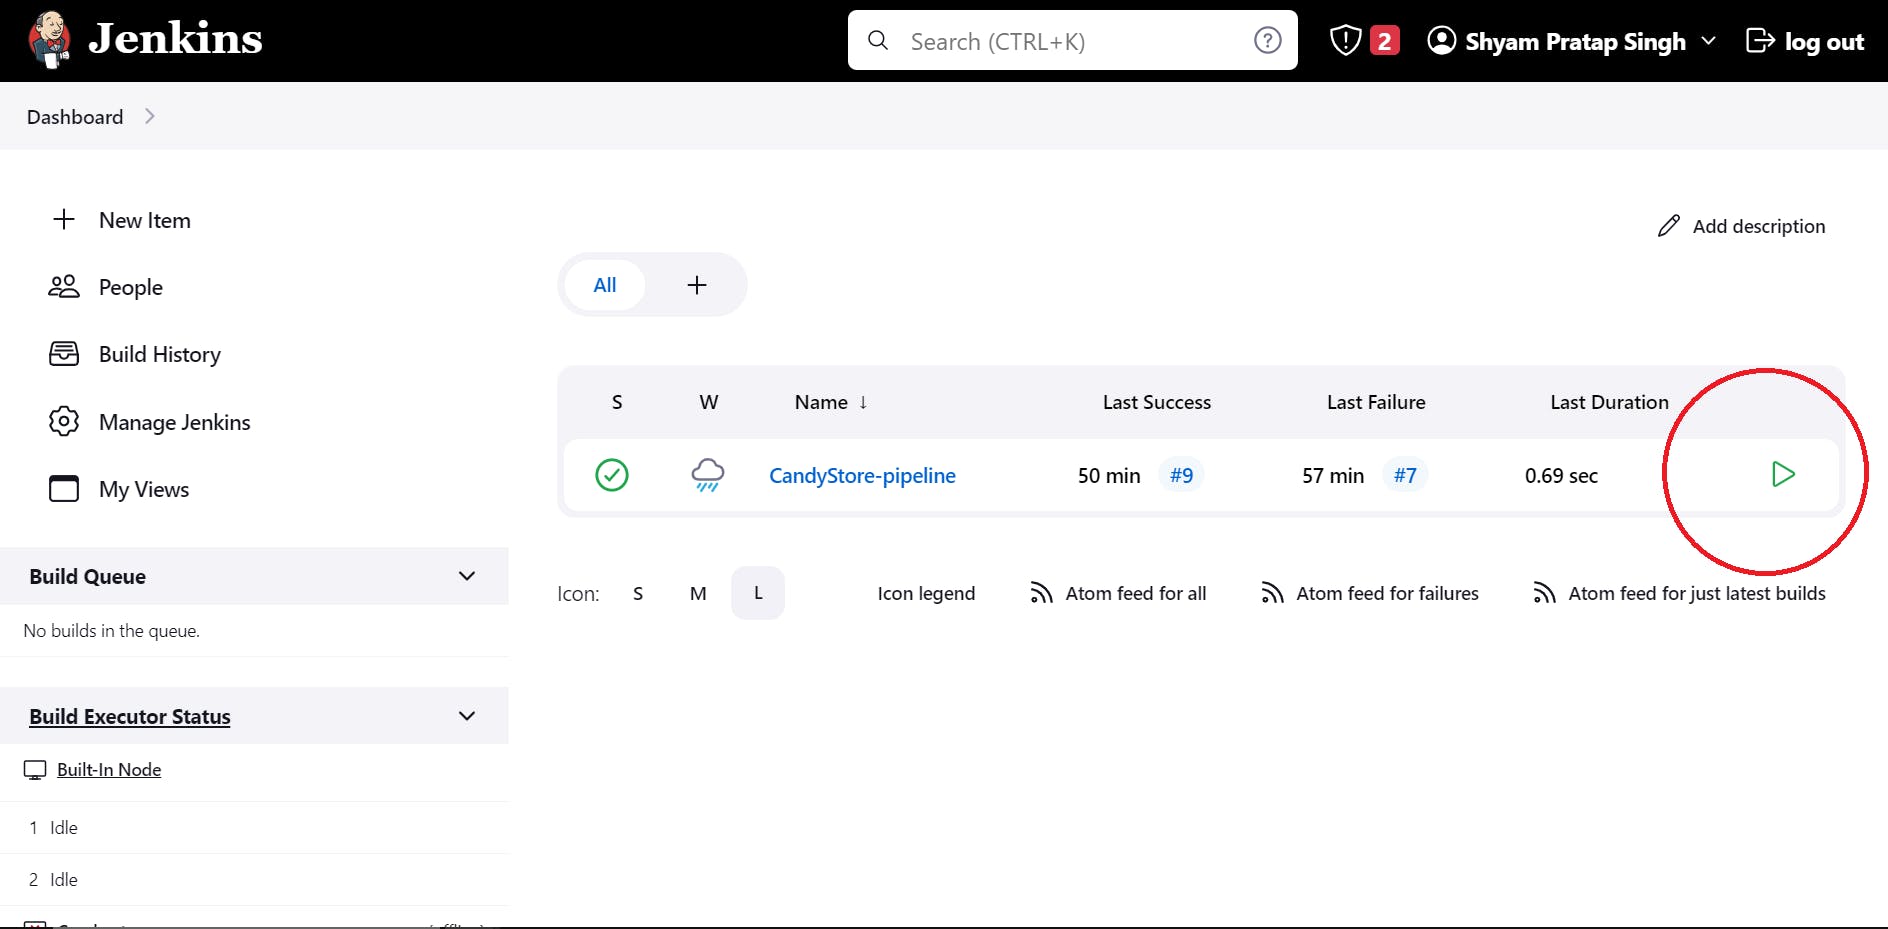
Now, we'll have a look at the dashboard as this is a CI/CD pipeline; every time the code is changed we have to press this green button in the circle, and it will automatically update the deployed project.
Thanks for reading.
I'm very grateful for your valuable time and please have a look at other blogs published by me.
Any sort of feedback or remark is highly appreciated. Feel free to mail me or you can connect with me on Twitter as well.

